|
Here are a couple of patches for the Chernobyletta to get you started with using the module. These are intended as a guide for you to experiment around. There's also a blank one for making your own settings. 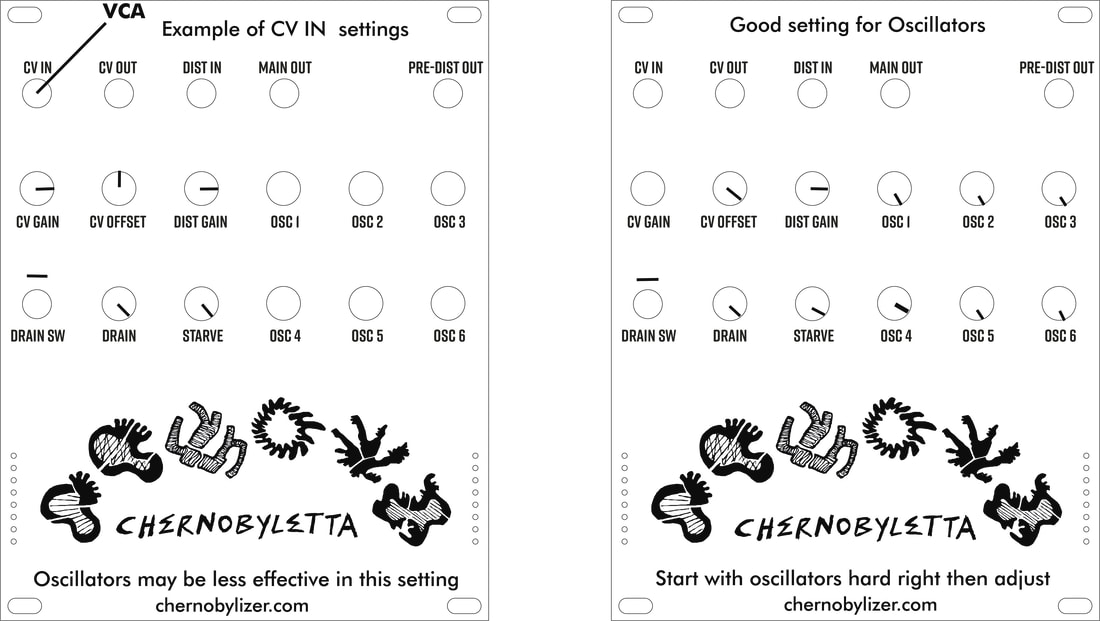  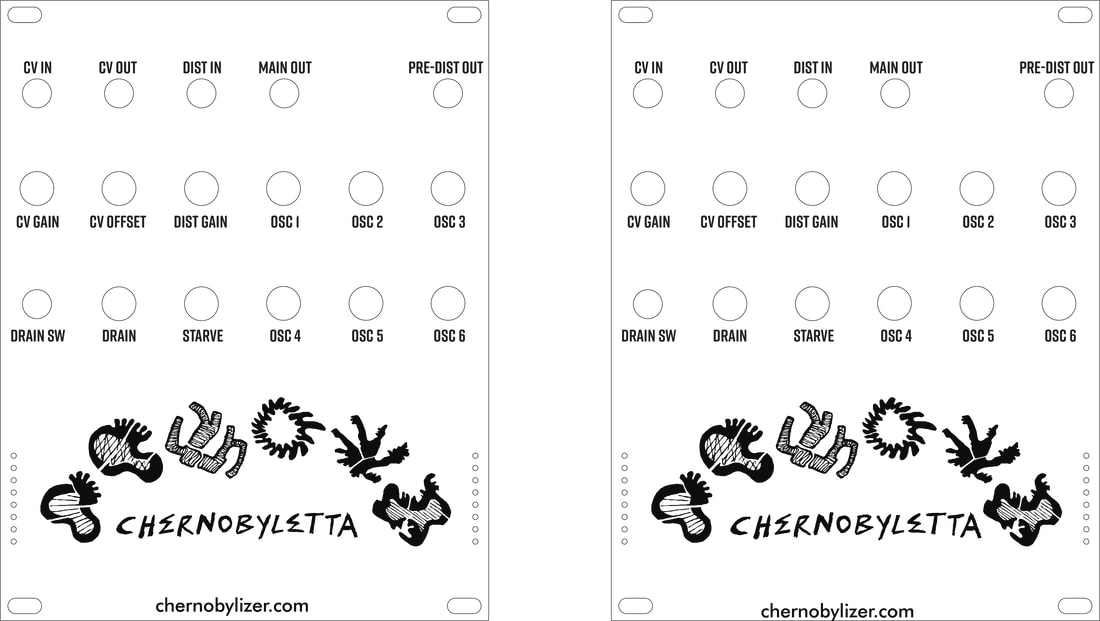 Chernobyletta can be found on our Etsy store
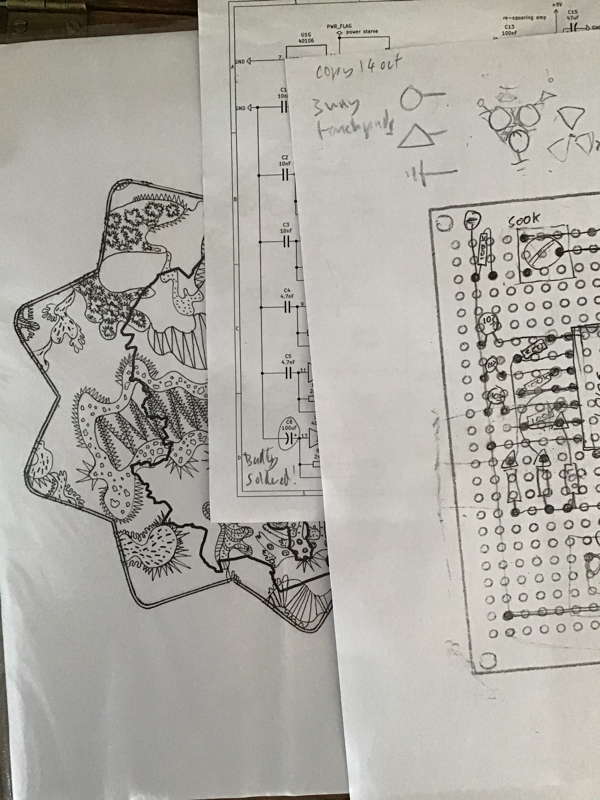
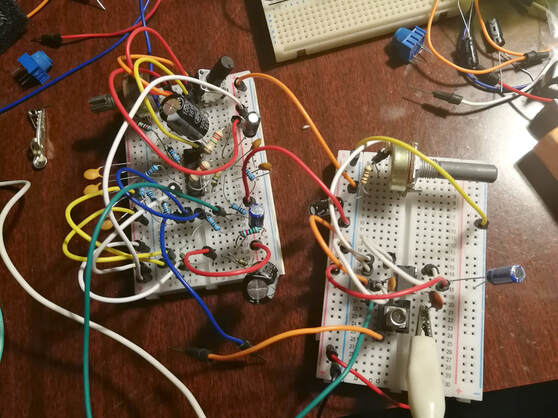
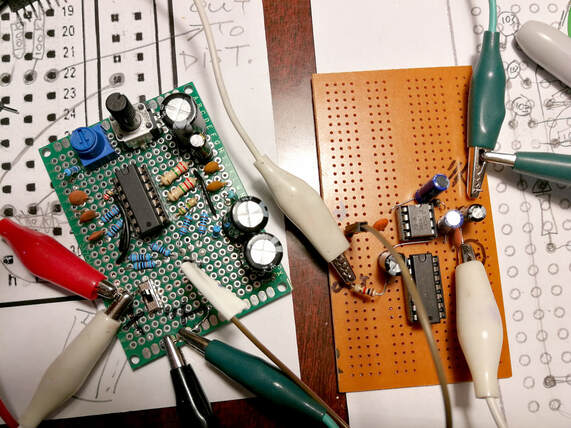
Available in our Etsy shop! Our Eurorack module Chernobyletta is based on the Chernobylizer but it is a little different. The Chernobyletta is the modular sister or twin of this synth but it does some things differently. Rather than being a standalone synth it is designed to fit into a modular system. With a variety of CV, ins and outs there are a great number of possibilities for making noise/music/drones/sounds/fx and it's a great basis for further manipulating, filtering and modulating with other modules. What we intended here was to make something that evolved from the Chernobylizer, they are still two very different beasts.  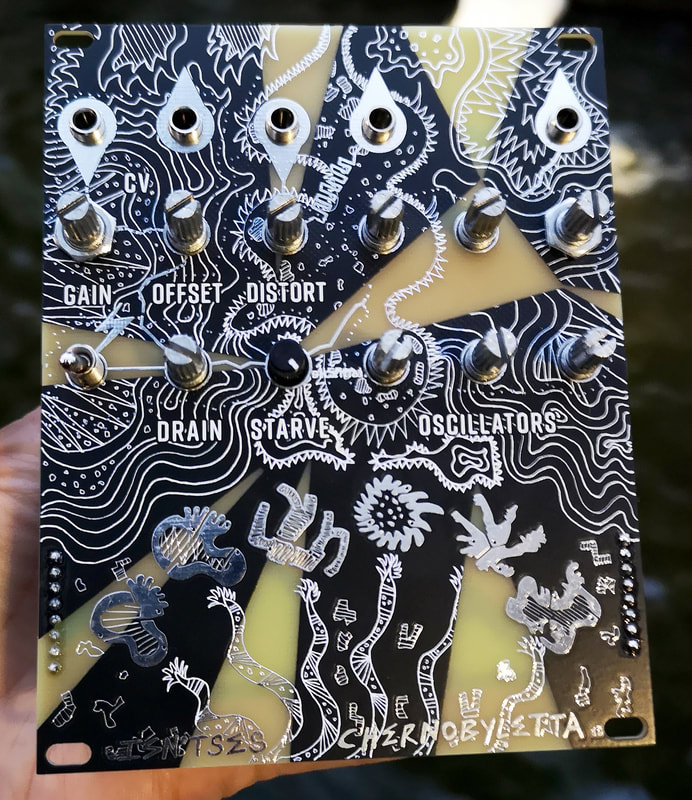 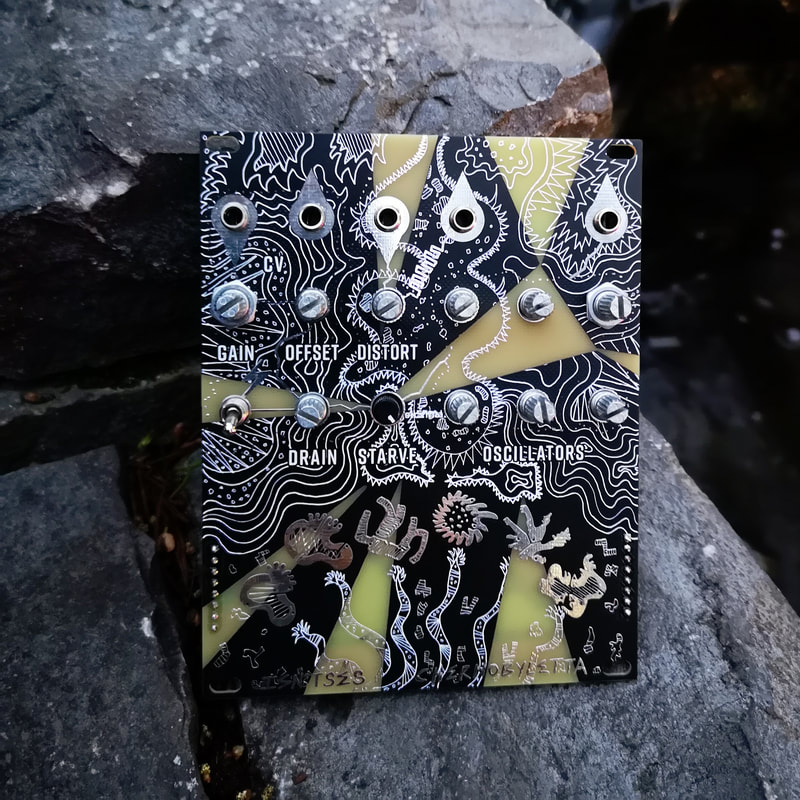 Demo videoThis video shows some of the functions of the Chernobyletta including the touch pads, power starve and how it interacts with a couple of other modules. Q&A How will the Chernobyletta fit into a Eurorack setup? It's 12hp wide and has various CV and audio inputs and outputs. It has 6 oscillators which are controlled by knobs, CV and power starve, and modulated by touchpads. What kinds of noises does it make? It still sounds like a distorty noisy beast but with more sonic possibilities due to the added control voltage inputs and the individual pitch controls for the 6 squarewave oscillators. It can produce a wide range of audio including heavy drones, harsh noise, engine-like pulsations and 8-bit-esque crunchy bleeps. Does it create a noise on its own? Yes, lots. :) It's fully playable as a noise/drone instrument even with no CV input connected, but it does require the Eurorack power supply. Even if you only had one module this would be an instrument in itself. Does it have the power drain function? Yes it does have a power drain function and this is one of the highlights of the synth as there are lots of interesting sonic possibilities while it power drains and you get a lot of nice sounds with the touch pads. This function is very similar to the Chernobylizer and can operate on a control voltage input as well as a continuous voltage from the power drain switch. Does it have the pseudo-filter section? We have omitted this section of the Chernobylizer circuit but we may develop it into a separate module in future. Do the touch pads still work the same? They work similarly and are very playable, but there are 6 touch pads rather than 9. Their effect can be quite subtle depending on the knob settings, or quite extreme on other settings. Sometimes they don't seem to respond much but you can find a sweet spot for this where they respond quite well. This depends on how you want to play the instrument and what settings you use. Can I own both the Chernobylizer and Chernobyletta or are they too similar? They make quite different sounds despite evolving from the same circuit ideas. The main difference is that the 6 starved oscillators which come together to create the main noise are individually pitch-controllable on the Eurorack module. Also the module features some modular-specific sections with normalled inputs so they can optionally be used separate from each other; a CV gain and offset control (which can also distort/clip the CV signal if you want) and an audio distortion section. There are two outputs, one directly from the oscillators, and one with distortion added. Can the Chernobylizer and Chernobyletta be used together? There is no reason not to use them together. The Chernobylizer's secondary right-hand input especially works well as an input to eurorack, as it is a hot, DC-coupled signal which we have always intended to work well with modular synths. The Fort Processor would also be interesting to hook up to the Chernobyletta. Can I build the module from a kit? We are just making a few pre-built modules for now, but have plans to make a kit version soon. What about the artwork? To make the artwork still look good on a module Lisa has redesigned the artwork so that it fits nicely on the new panel shape but the drawings she made were based on the original Chernobylizer. We are keeping the touch pads! So this is consistent with the Chernobylizer. With the Chernobyletta we have included a couple of LEDS that shine through the panel making it super cool and showing you the signals doing their stuff. The bits of the board where there is bare colour shining through is also UV-reactive. What exactly does the CV do on the Chernobyletta? In a very electronically-unorthodox move, the chip which creates the 6 squarewaves is powered by the CV input, giving an unusual kind of voltage control over the noise. This is not voltage-per-octave or even HZ/Volt, but is very playable and has a wide range. The Gain and Offset knobs allow you to use various different kinds of input and tweak/tune them to a range that you prefer. These controls give you the flexibility to use bipolar signals (eg LFOs or even audio) or unipolar signals (eg ADSR, sequencers etc) or any other eurorack signal you want to experiment with. What do all the knobs do? There are 9 knobs altogether: CV Gain - Controls the CV input level, from silence all the way up to fuzz/distortion to square off the waveform if you want. CV Offset - Adds a full range bipolar offset to the CV signal so you can tweak it positive or negative as you need. You can take this to extremes, turning the signal into complete positive or negative DC offset if you desire. Without a CV input jack plugged in, the Gain knob does nothing and the Offset knob controls the overall pitch of the oscillators directly instead. CV Out jack - allows you to optionally output this altered CV signal to other modules. Drain - Turned anticlockwise this reroutes the power CV through a bank of large capacitors, charged by the switch, causing weird smoothing of the signal and a gradual draining effect. Starve - further starves the drained signal, lowering the pitch and increasing the chaoticness of the noise in mysterious ways. Oscillators 1, 2, 3, 4, 5, 6 - these 6 knobs tune the pitch of the 6 starved oscillators, which are then mixed together and sent to the outputs. They have a wide range so you can go from extremely high pitched to low rumbles, crunches and clicks beyond the audio spectrum. Distortion - controls the amount of fuzz/distortion/gain on the main output. If you plug a signal into the Distortion Input that will override the oscillators, and instead distorts your own signal. (the secondary output on the right still puts out the oscillators tho. The secondary 'clean' output doesn't have this stage so it has a different character of its own, with more dynamics and sounding quieter when the oscillators are very power-starved.) The distortion circuit uses LEDs as clipping diodes and these shine through the front panel so you can see as well as hear the noise. What does the switch do? Drain switch - Switching it upwards injects a fixed voltage into the large capacitors in the drain/starve circuit, which affects the sound when the drain knob is turned anticlockwise. Subsequently switching it down cuts off that voltage source and then you get the classic Chernobylizer power drain effect. People often mistake this switch for an on/off switch but it is the power drain switch. Is there an audio output? Yes there is that is distorted and one that isn't. The non-distorted signal can be processed though other fx/distortion/filter modules or even used to make a feedback loop back to the CV input of the Chernobyletta Is there an audio input? As mentioned, the distortion section has an input, but also you can put audio into the CV input for all sorts of noisy results. You could even use the offset/scale section as an asymmetrical distortion effect with the CV out as an audio output. What is the power consumption of the module? On the +V rail about 40-50mA On the -V rail about 10mA DevelopmentThe design of this module went thru a few stages, we initially tried something that was more of a direct clone of the Chernobylizer but once we got to the prototype stage some parts didn't really work properly and others needed rethinking to work better in a modular system so we redesigned it quite a lot for the next version. We used the Falstad online circuit simulator quite a bit to try out circuit ideas before breadboarding them or building soldered versions on stripboard. Solderless breadboard gets quite fiddly and can be unreliable once a circuit gets too complex so we found that it's better to solder different sections of the circuit once they are confirmed to work individually, then connect them all together to test out the entire circuit and connect the inputs and outputs to existing modules. Deciding on a design for the distortion part of the circuit took quite a while. In the end we used a fuzz-pedal type approach using LEDs as clipping diodes which as a bonus provide a visual aspect, we designed the front panel so they shine through the PCB material creating a glow which flickers and fluctuates according to the audio :) As ever we drew up the final schematic in KiCad and used that to design the PCB and the front panel. Thanks Zack Nelson on the Synth DIY facebook group for helping us figure out how to get the scale/offset part of the circuit working. Development artwork and ideas. Original artwork by Lisa McKendrick - a new artwork design was made for the Chernobyletta based on the Chernobylizer, some of the touch pads are the same. It is designed so that the LEDs shine through the shapes on the panel. You can read more about the initial ideas behind the original Chernobylizer here and here on our blog. 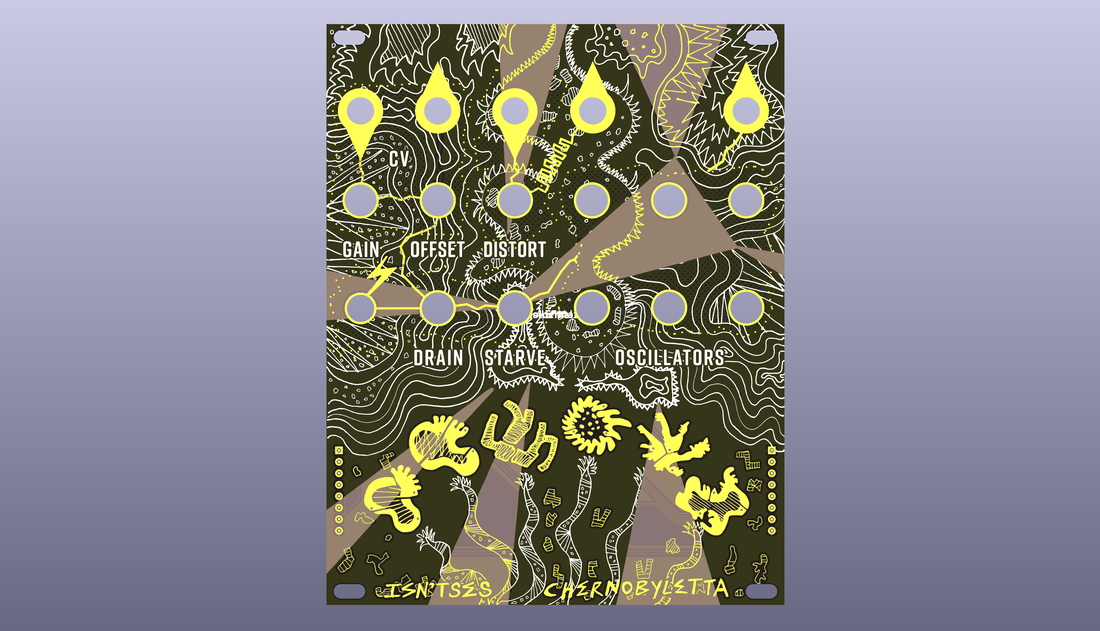  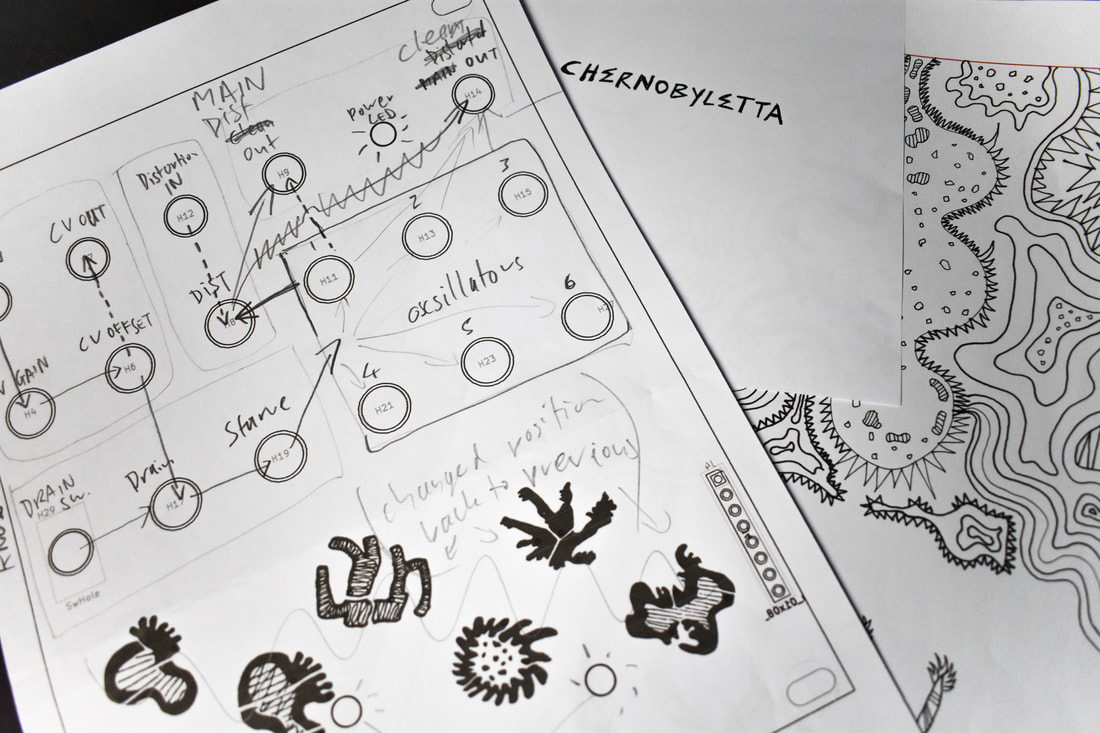 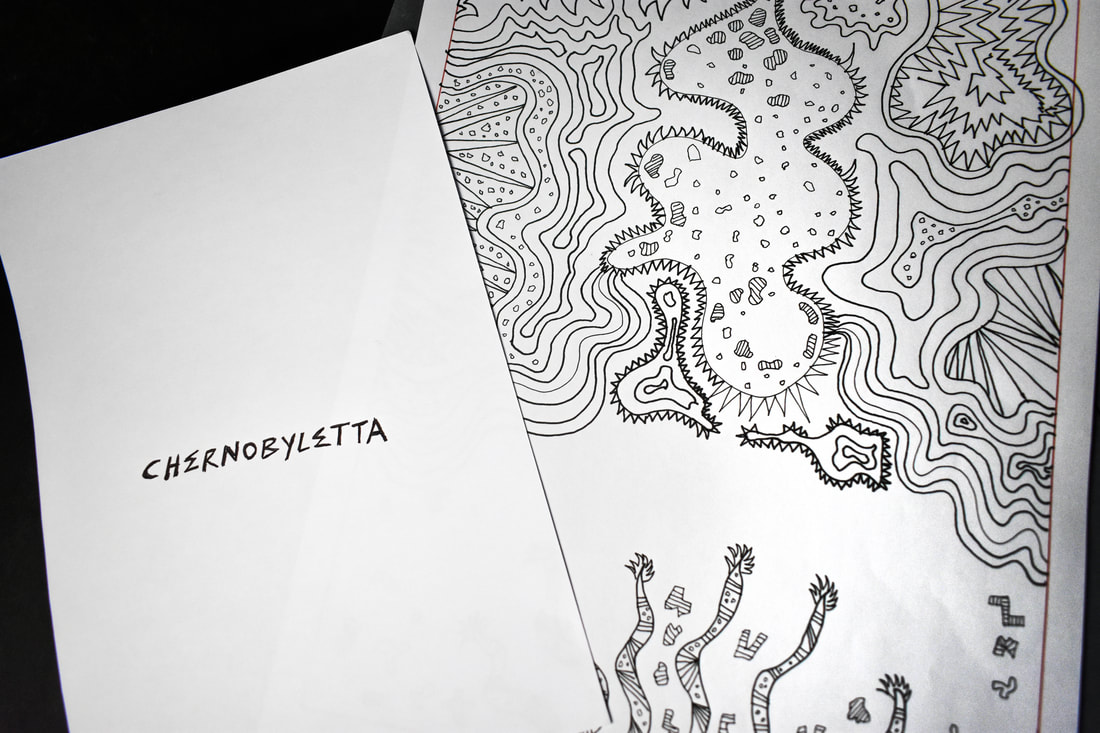 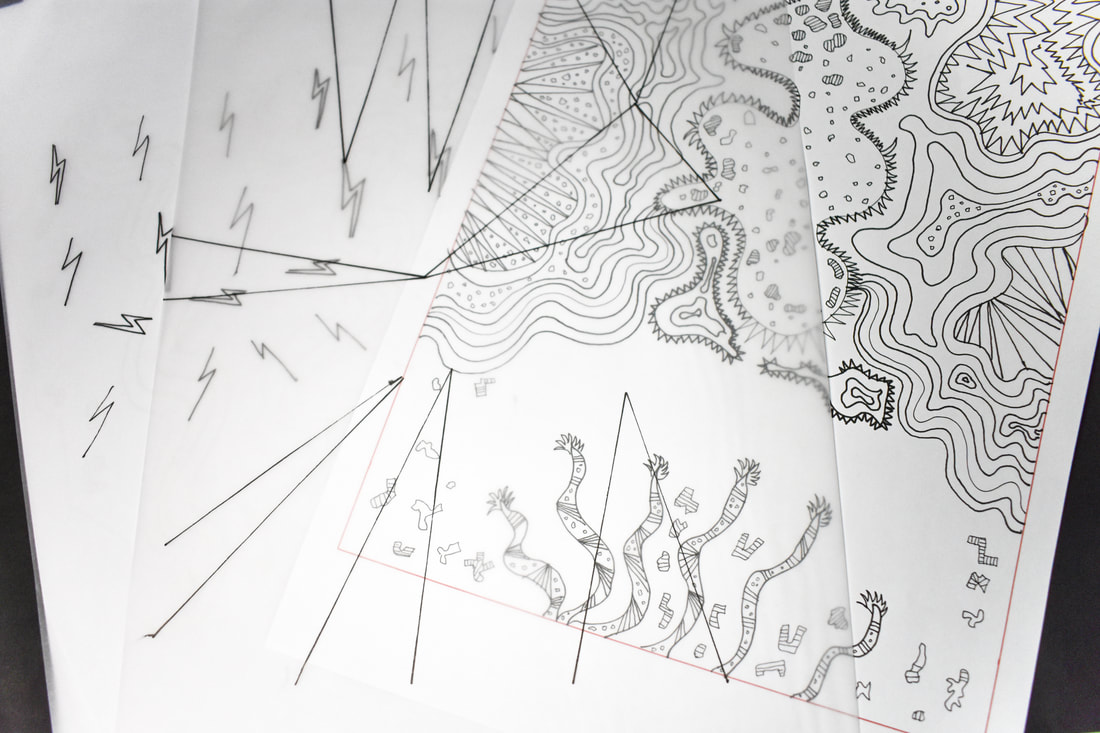 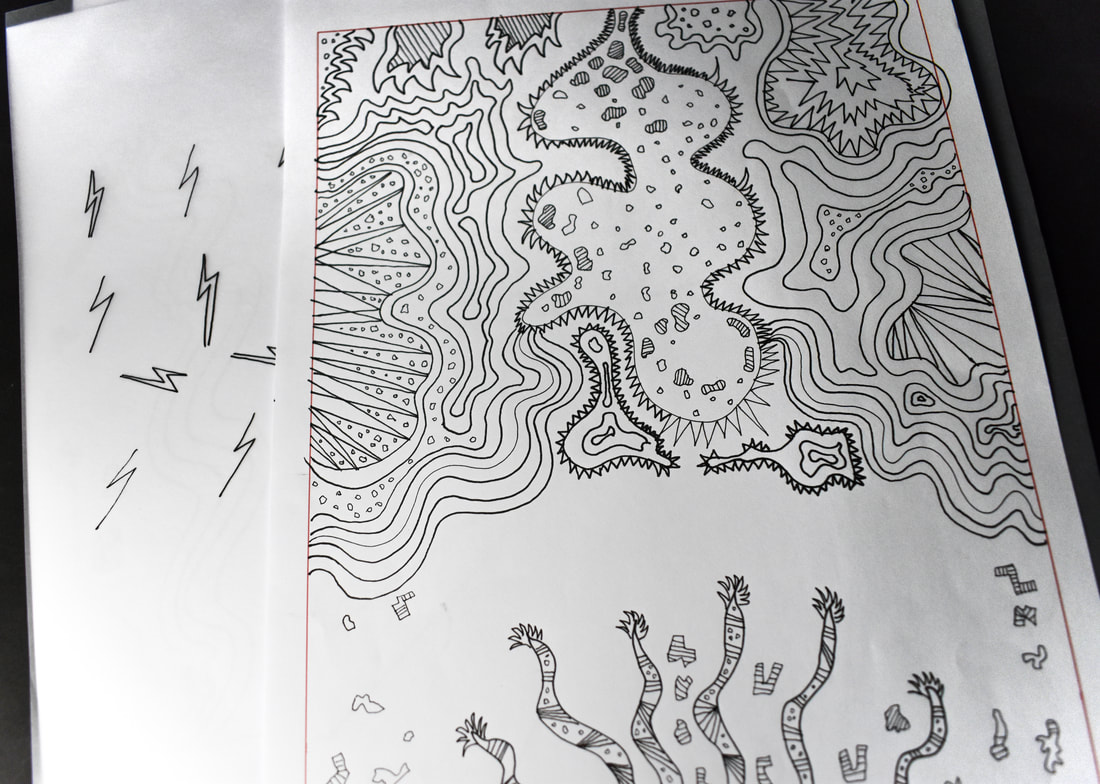  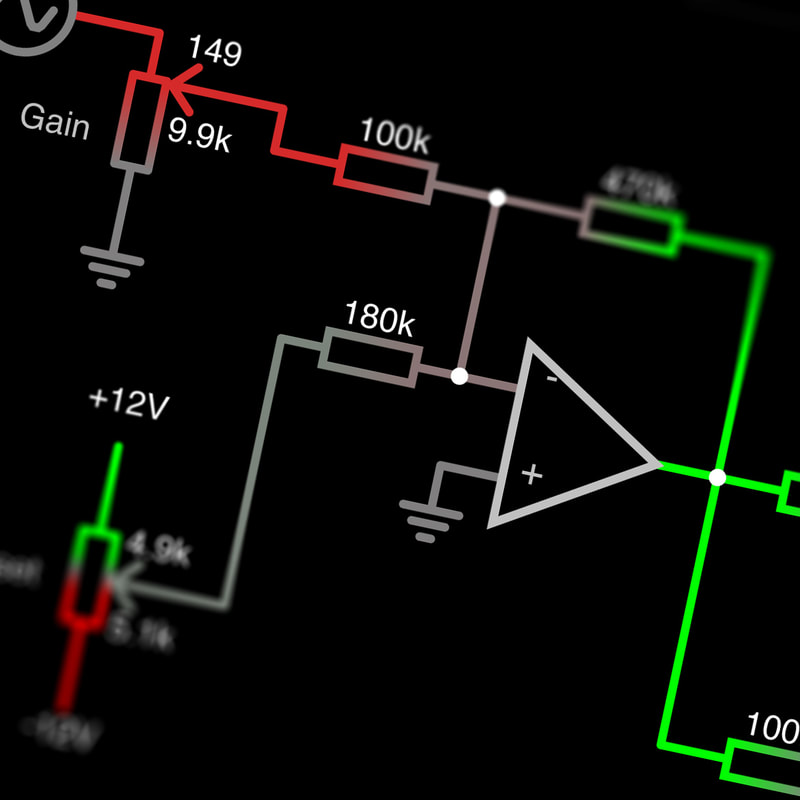 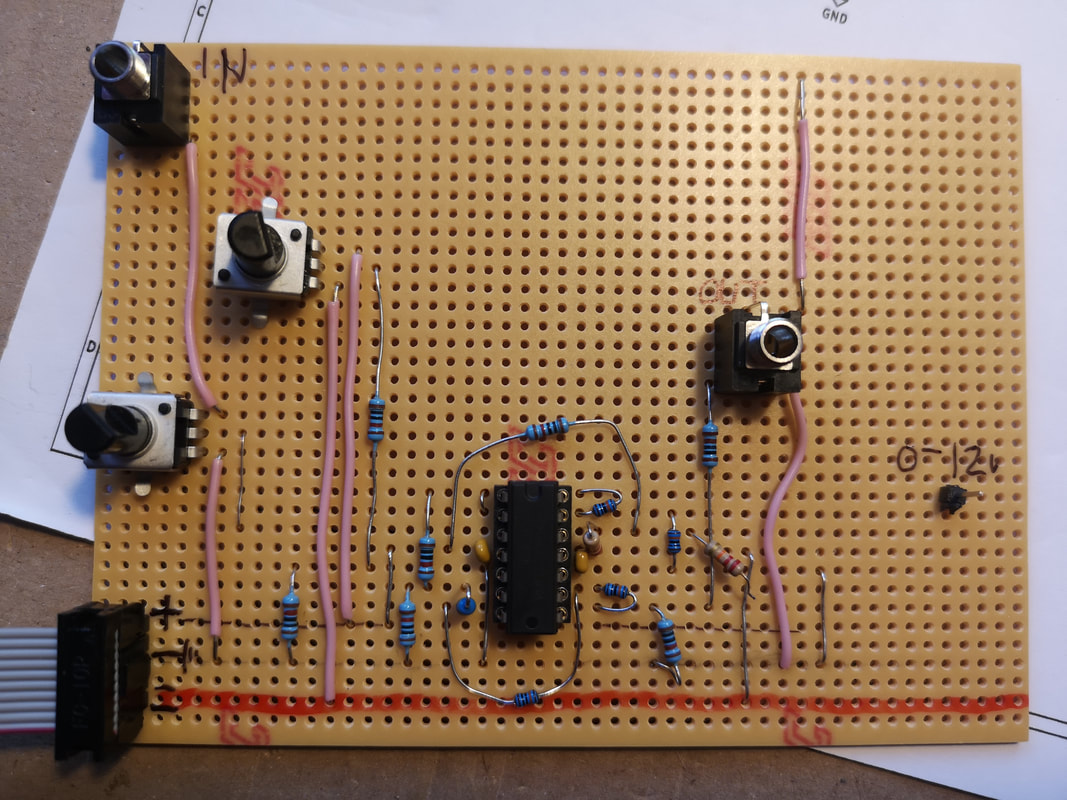 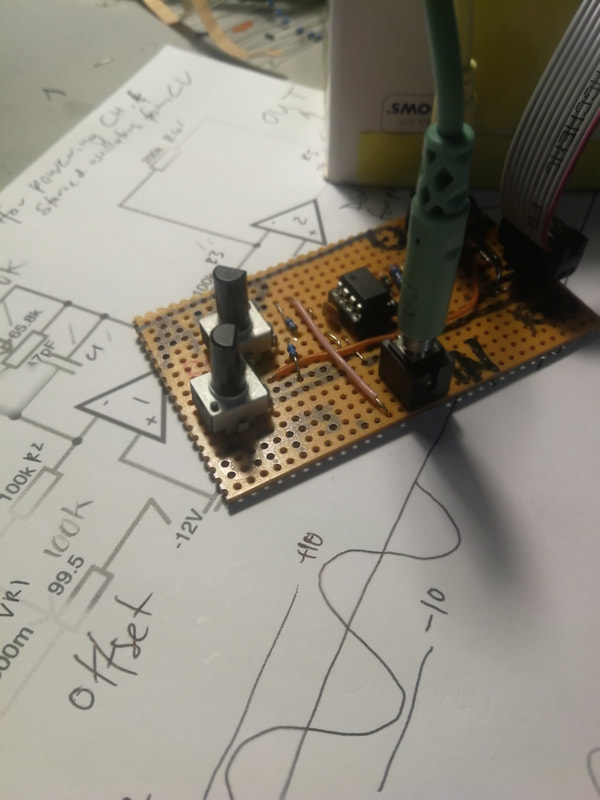  We will be facilitating an electronics synth building workshop this year at Crux Festival. It's at Rich Mix, 35-47 Bethnal Green Rd, London, E1 6LA Sunday 14th April 2024 2:30pm - 6:30pm The workshop will begin with a presentation (45mins) where we will cover the development of our noise synths The Fort Processor and the Chernobylizer. The inspirations behind the electronics and sound as well as the psychogeographic aspects of the design and artwork. During the presentation the basics of electronics will be covered including identifying components, how to populate a PCB correctly, and reliable soldering techniques. The workshop takes place at Crux Festival: https://festival.crux-events.org/programme-2024/synth-building-workshop/ Anyone at the festival can attend the presentation part of the workshop with simple breadboard experimenting. If you also want to build one of our synths you can book a place in the workshop (limited to 16 people) by filling in this form: fill in this form. (Please note that you will also need to separately purchase a day or weekend ticket to the crux festival from festival.crux-events.org) All materials and equipment will be provided and participants may keep what they create. No previous experience in electronics or music performance is necessary. Suitable for anyone with an interest in experimental music and sound arts. Isn'tses (Lisa McKendrick and Tim Drage) will host the workshop and provide assistance during your build. We have 3 different synth builds to choose from:
If you wish to build one of our synths and to secure a place, please fill in this form.
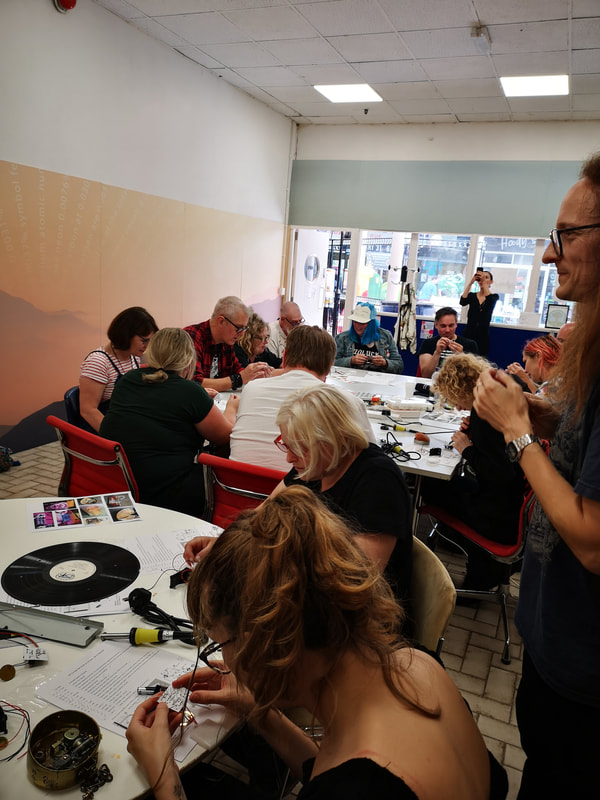
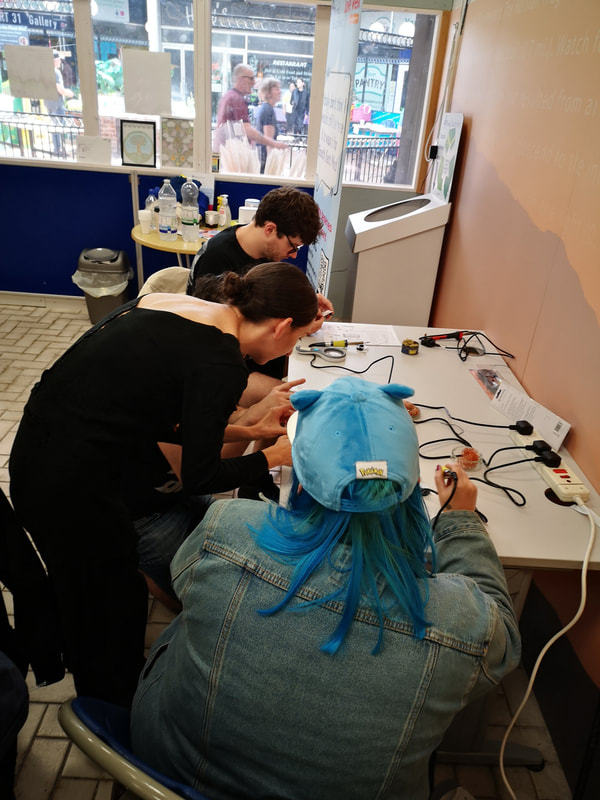
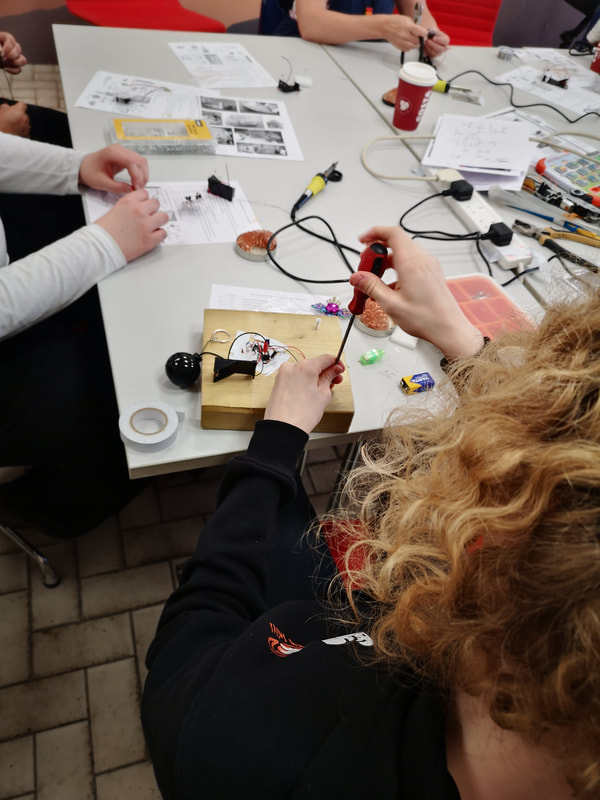
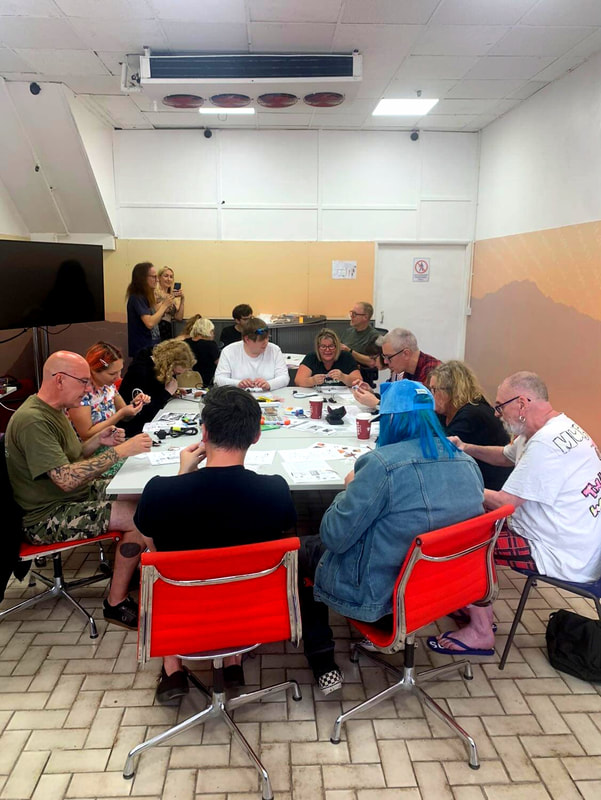
PLEASE NOTE: In order to attend you will also need to separately purchase a general Crux Festival ticket (for the full weekend or just sunday 14th) from festival.crux-events.org Some photos from the workshop. Thanks to everyone who attended. To hear about more of our workshops join our mailing list on the home page.  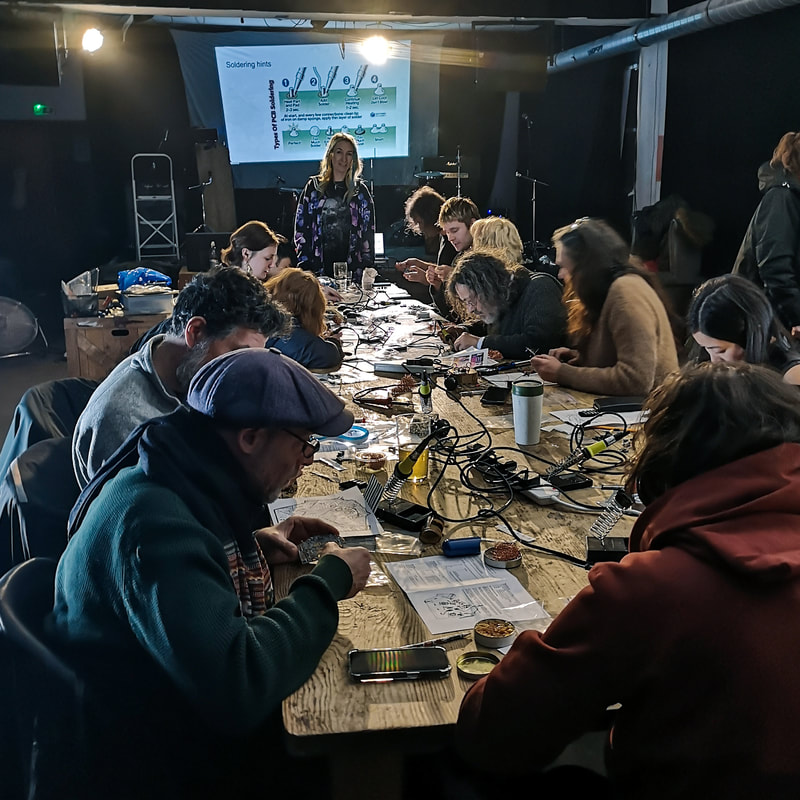 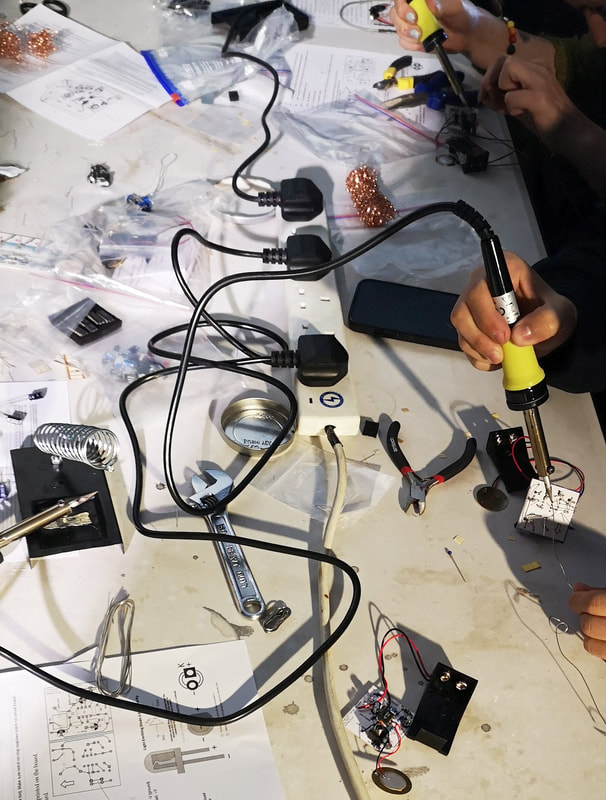 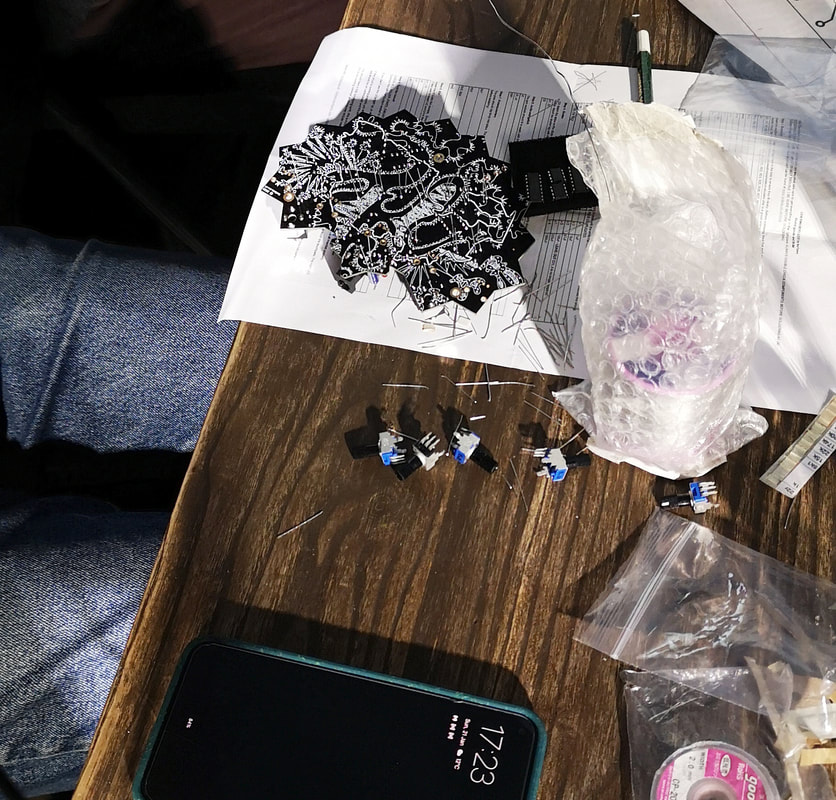 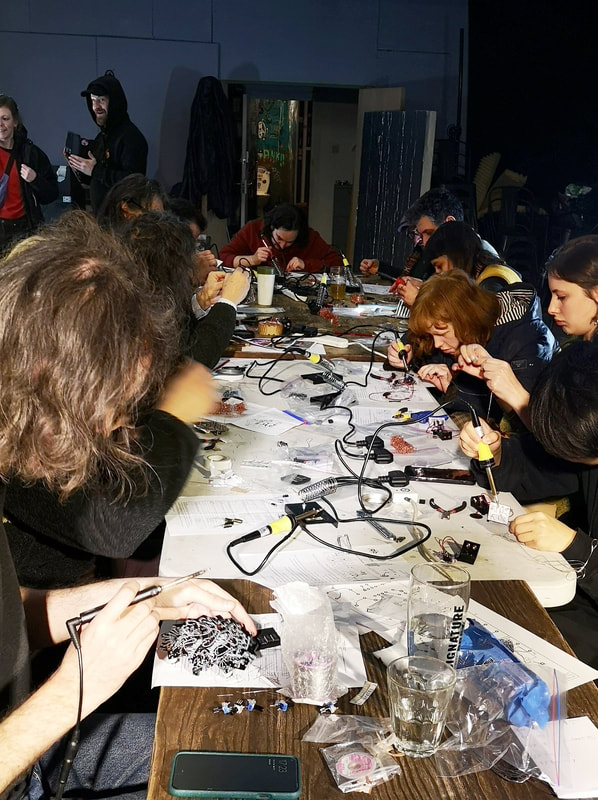 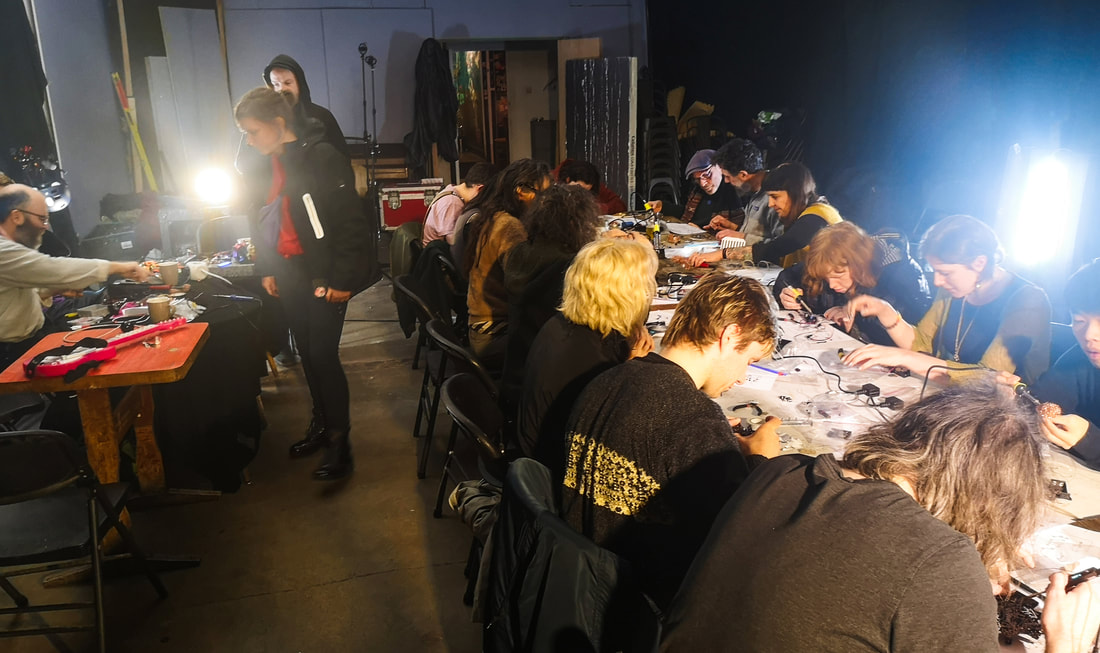 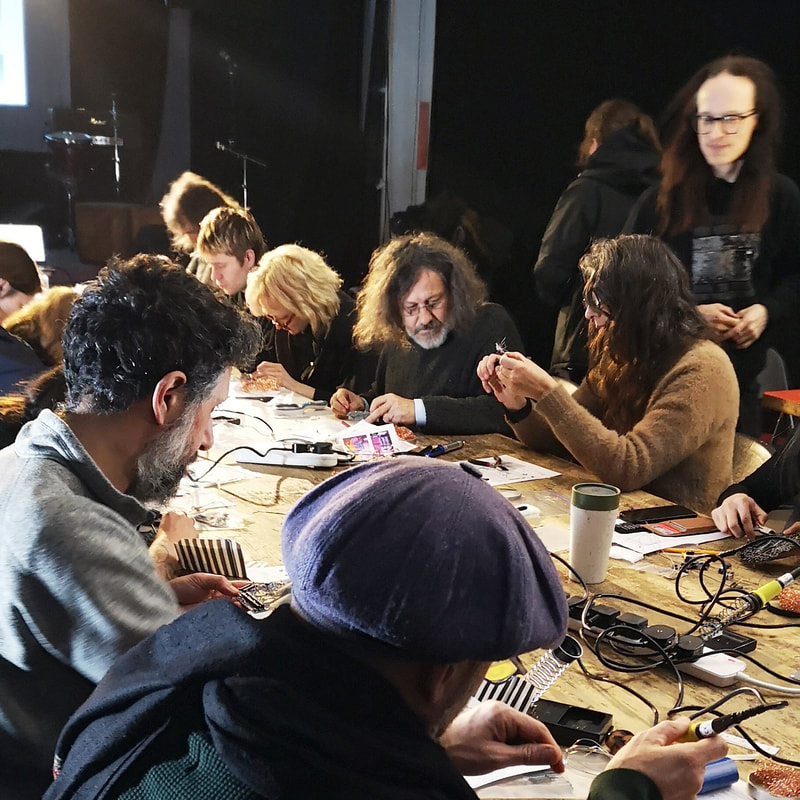 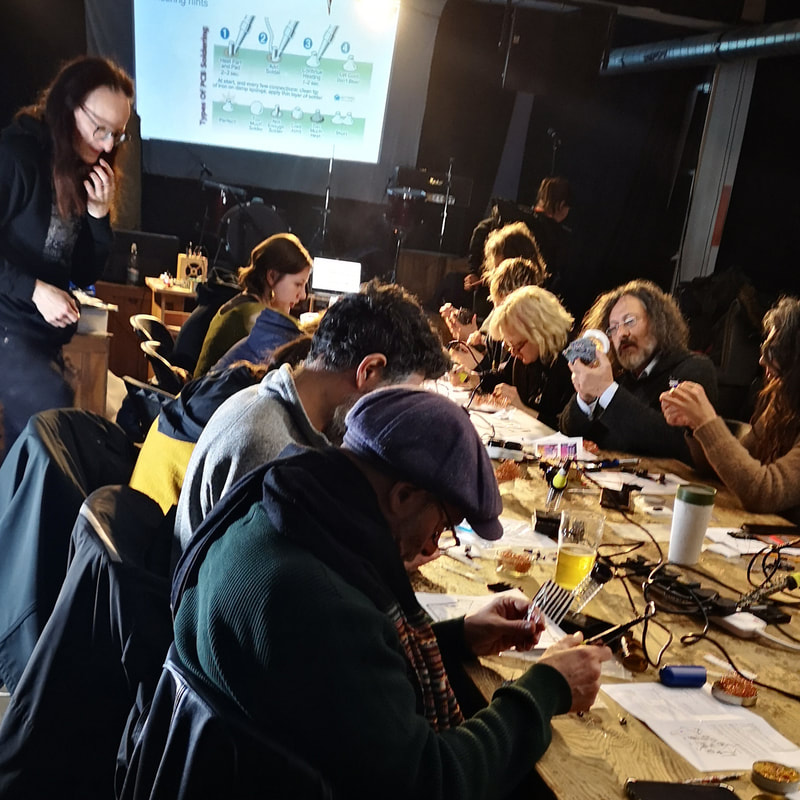  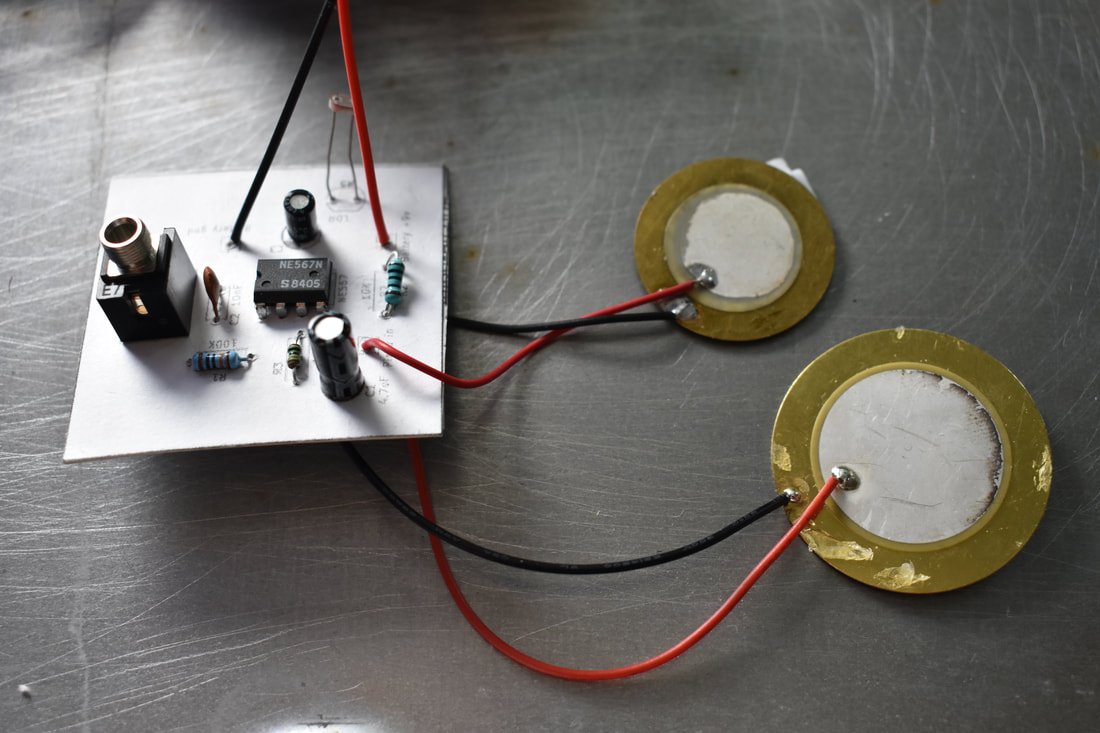  Book tickets here We will be running a noise synth building workshop on the 21st of January 2024 at New River Studios, London, N4 1DN It's part of #Oooh_CircuitBent : an International Gathering of Circuit Benders, a festival on the 20th and 21st organised by Psychiceyeclix, #Oooh_Festival and SKRONK. Participants can choose one of three projects to build at the workshop:
All materials and equipment will be provided and participants may keep what they create/ No previous experience in electronics or music performance is necessary. Suitable for anyone with an interest in experimental music and sound arts. Isn'tses (Lisa McKendrick and Tim Drage) will host the workshop. The workshop takes place on Sunday 21st Jan 2024, 3pm-6pm at New River Studios, 199 Eade Rd, London N4 1DN More info about the festival can be found on the #Oooh_CircuitBent facebook page.  We are holding an electronics workshop in London. Build your own square wave ring-modulation synth based on the LM567 Tone Decoder chip. The circuit includes light-dependent control over pitch, a built-in piezoelectric contact microphone, and candle-flicker LEDs for additional modulation. Participants will have the opportunity to learn basic principles of electronic circuits and components, gain hands-on experience soldering and assembling a custom circuit, and explore their creative potential by crafting a unique electro-acoustic instrument from a range of different up-cycled materials.
Saturday 16th Sept 2023 12-5pm (some people may finish earlier but we've allowed plenty of time so that everyone has the chance to finish their circuit) Tickets are available here: telegrafia.uk/events/workshop-build-your-own-diy-synth-with-isntses/ Facebook event page: www.facebook.com/events/339711891719128/ Following the workshop that evening is a Nose=Noise event: telegrafia.uk/shop/nnnnn-x-telegrafia-0004-16th-sep-2023 For further info and more pics of our last workshop: build-a-simple-synth-workshop-dover-2023.html We hope to see you there! Tim & Lisa
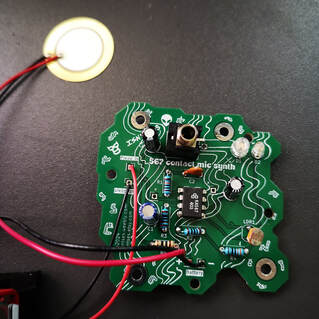
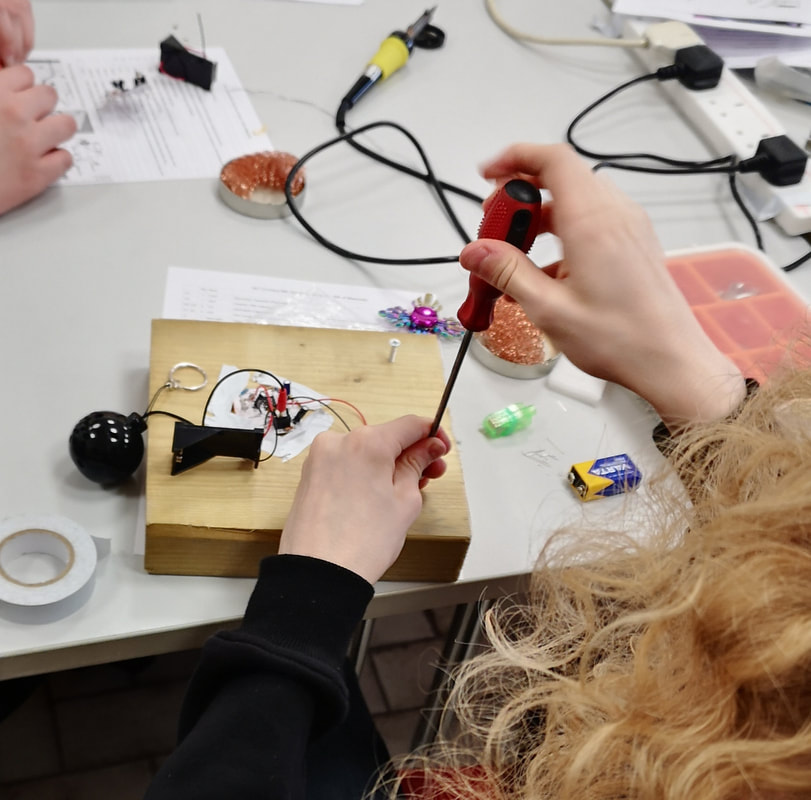
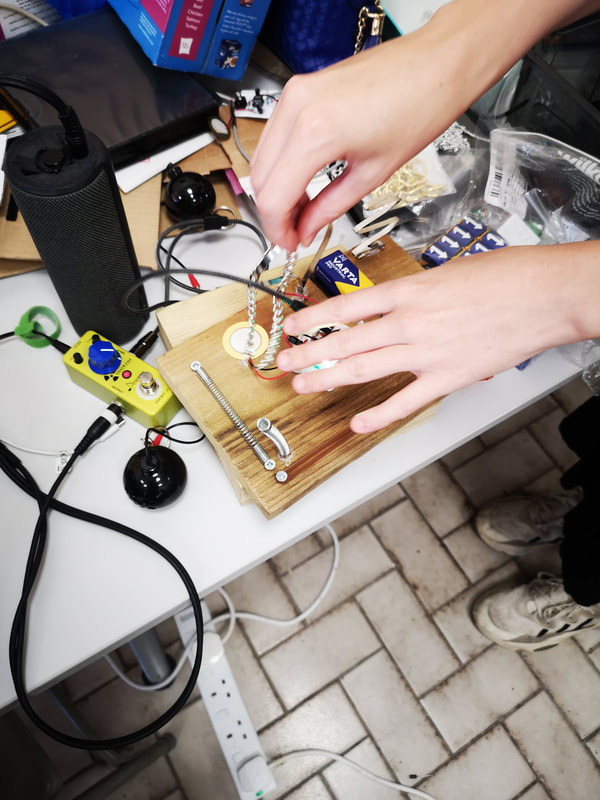
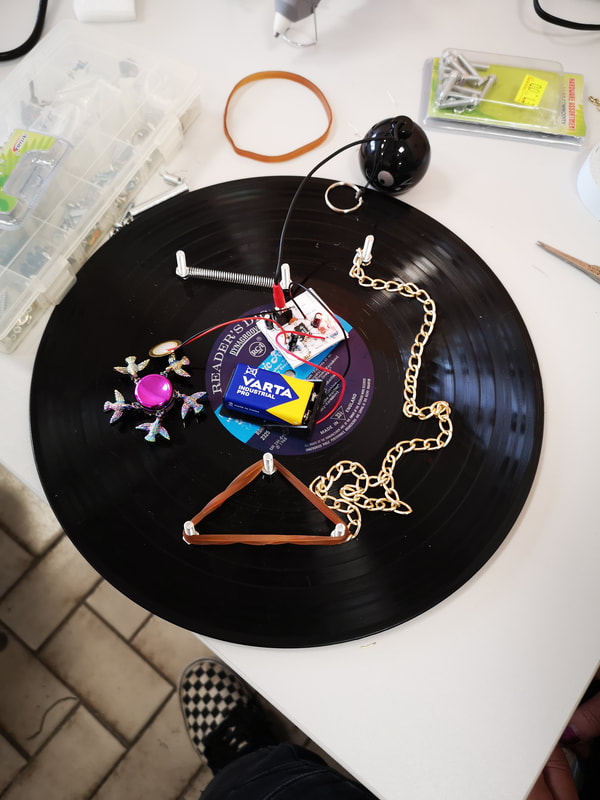
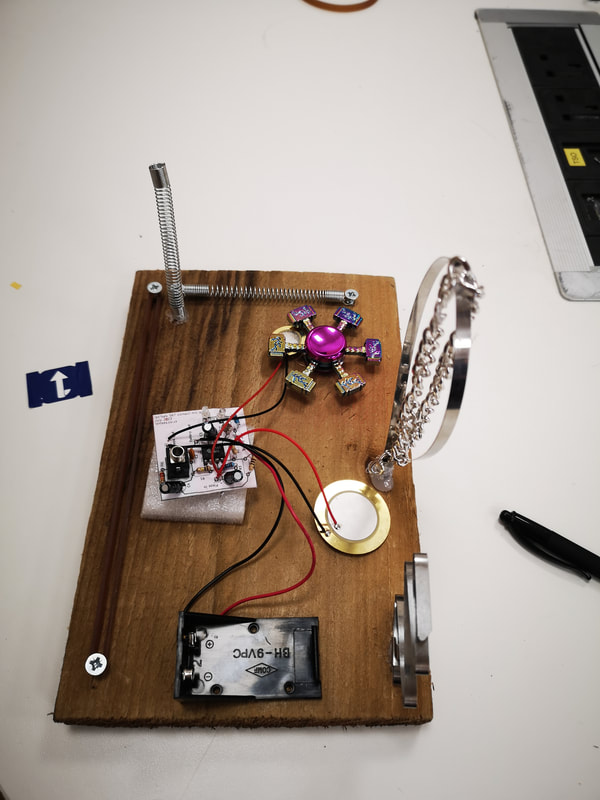
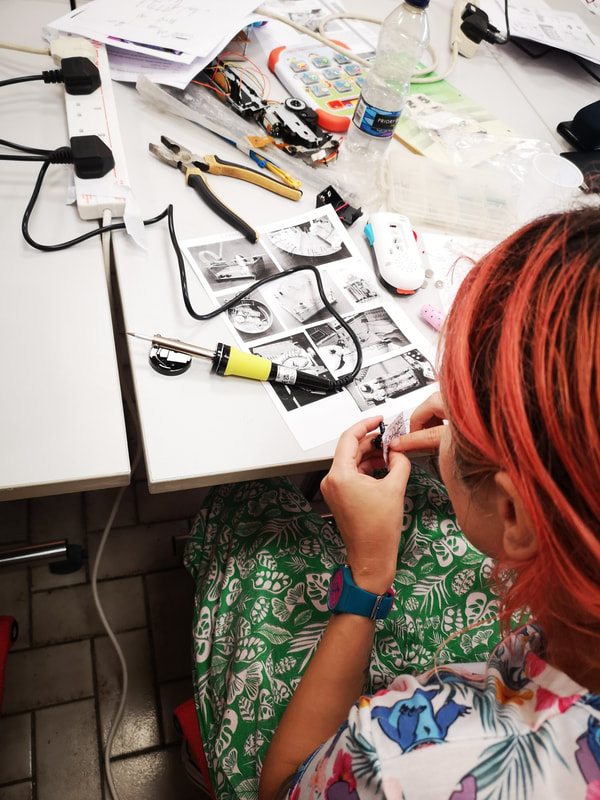
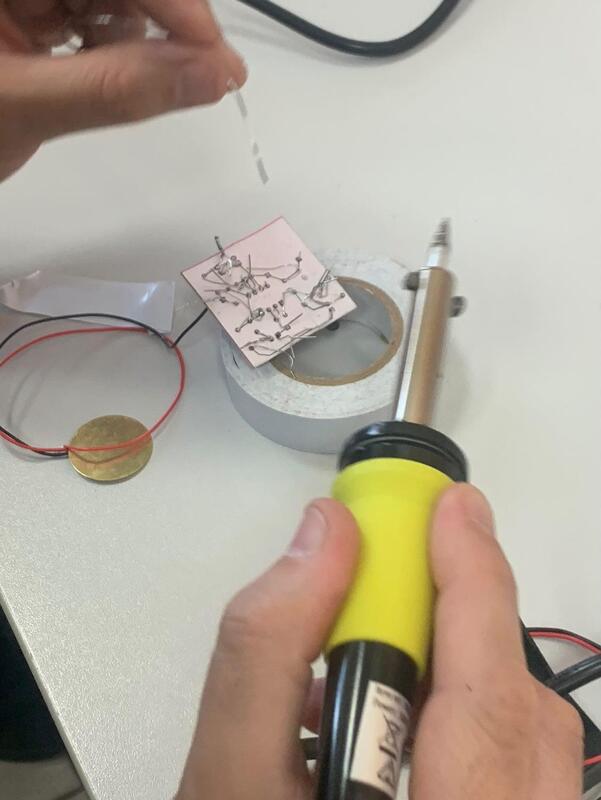
Some photos from the workshop. Thanks to all participants and to We’re All Bats for having us. 29 July 2023 To participate email [email protected] with the name of the workshop https://www.wereallbats.co.uk/dover 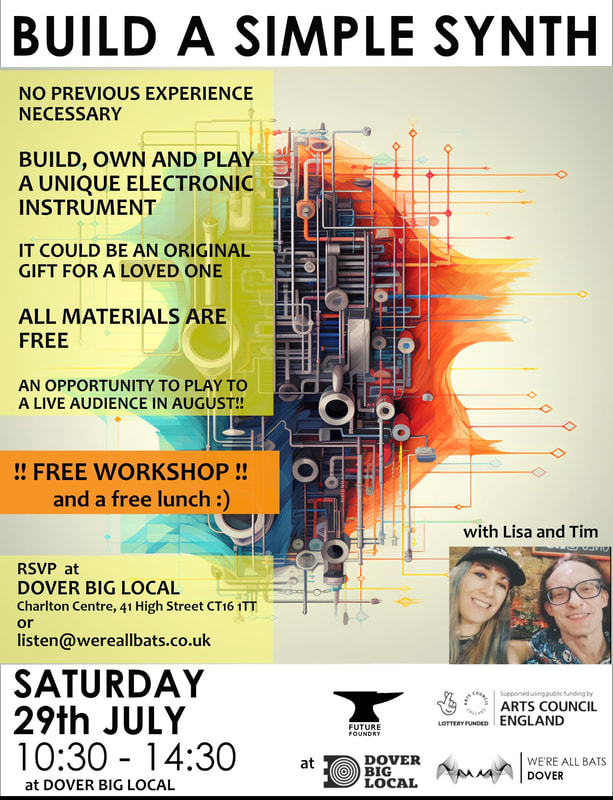 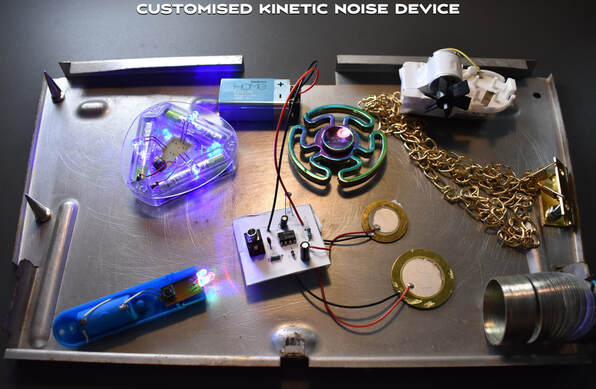 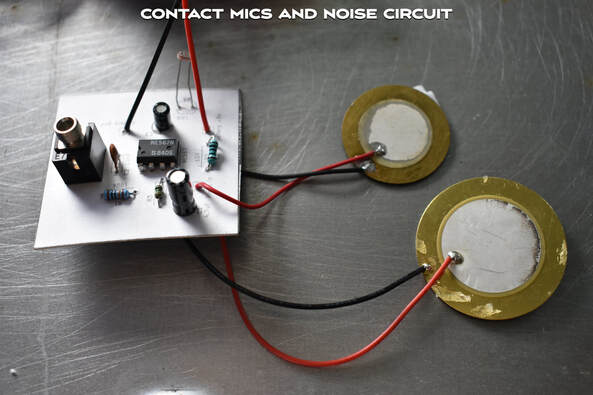 During the workshop participants will build a noise device with contact mic and synth circuit which they can build and solder. This can be customised with a variety of objects for making noise and we will supply a spinner toy or other toys as a kinetic component. We will also have a selection of circuits recycled from toys which participants can add to for lighting or other sound enhancements. We will bring a base for participants to work on but they are welcome to bring their own unique base if they like. Ideas for a base are tin lid, strong fabric, old box, strong cardboard, wood etc, so long as the surface is around 15-20cm long. Participants will learn about piezoelectric contact microphones, soldering electronic circuits using the 'paper circuit' technique. They will explore the creative use of amplification, feedback and light-controlled sound in experimental music and sound art. All materials are supplied but participants are encouraged to bring their own soldering iron if they have one and any items they would like to add to their device to personalise it. Here are some examples of DIY synths mae by us using contact mics and other components to make a unique instrument.
INSPIRATION
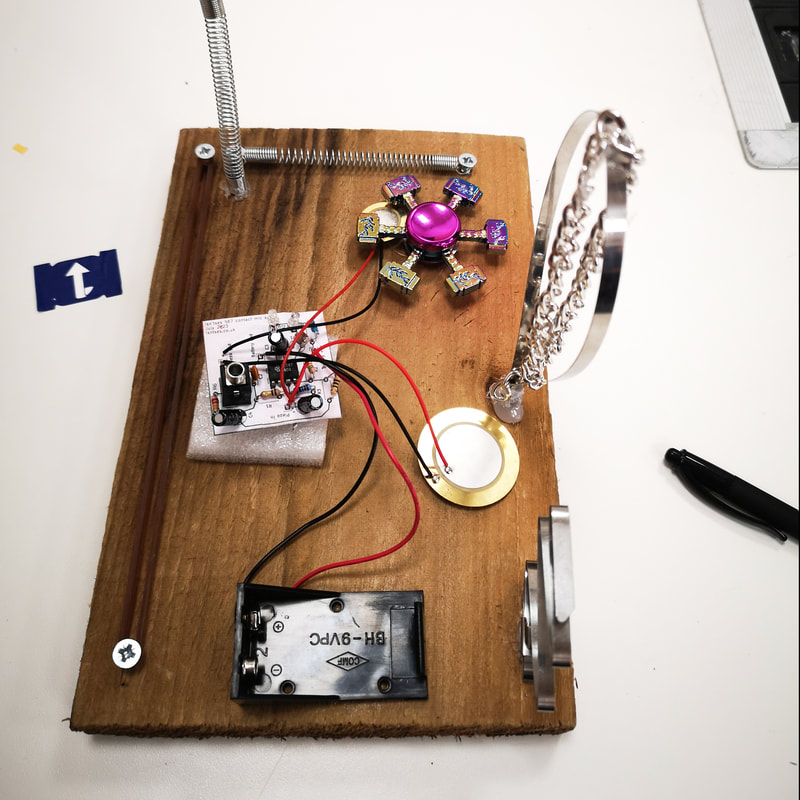
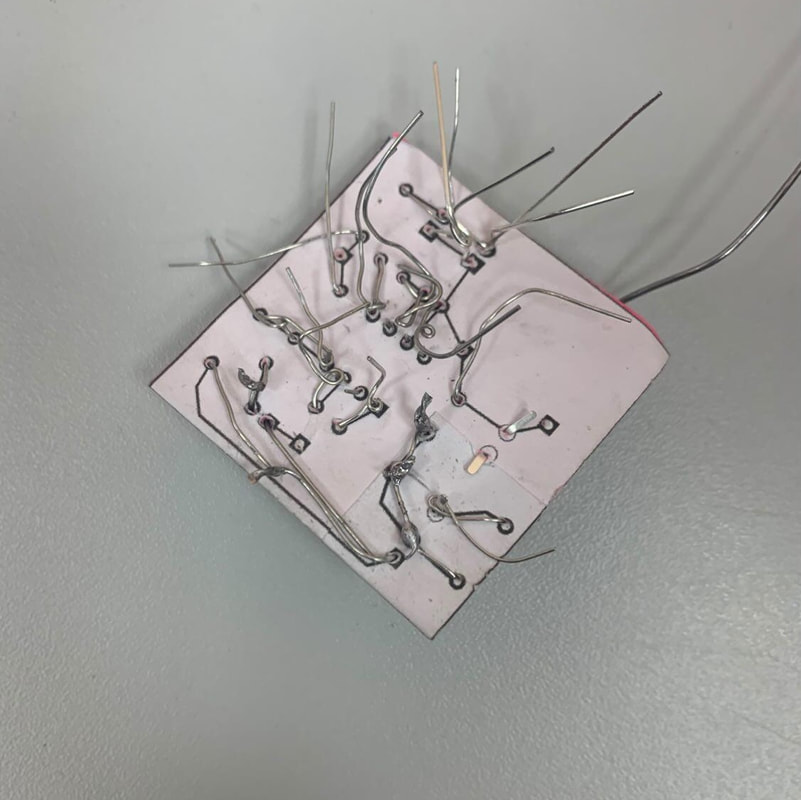
The circuit we will be building is developed from the ’noise567’, originally designed Christian Hemmo in 2001. An NE567 Tone Decoder IC is wired up in a completely unorthodox manner to create a very noisy and strange squarewave generator / ring modulator. Through experimenting and circuit-bending we have changed component values to find our own sound, added a built-in contact microphone to amplify springs and other physical objects, and added a light-dependent resistor to allow for theremin-like pitch control using handheld torches, flashing light toys, strobe lights, sunlight and shadows, or any other way to modulate the amount of light hitting the sensor. The circuit is built using the ‘paper circuit’ technique. Instead of a conventional manufactured printed circuit board with copper tracks, the circuit layout is printed on thin card. The component legs are poked through pinholes in the card and twisted together on the other side, then soldered. This very accessible technique was pioneered by experimental synth designer Peter Blasser, who publishes many unusual sound circuits in this format, for example the ‘Rungling’ featured in the book ‘Handmade Electronic Music' The spinner toy component is inspired by a gig we did under the name of 4’33’society which was led by Phillip Raymond Goodman where members of the group were invited to create methods to create sounds and noise with a fidget spinner. For our next experiment we wanted to see what happened when using a solar panel to bring in light, creating control voltages to control pitch in a similar way to the LDR on the Fort Processor. We've filmed a few of the results. These are very initial ideas so far. We wanted to imagine how Mars sounds and so far recordings by NASA show that yes Mars does sound like Noise ! (see video 2nd video in this post) We wanted to use this idea on a simple circuit just to see what happened. We are using the same '4000 series' CMOS chips as in the oscillator section of the Chernobylizer. We skipped the breadboard this time and instead are using a cardboard/paper board and used a compass to poke out the holes for the components. The circuit is Ciat Lonbarde's 'Rungling', which we are using as a starting point to circuitbend and modify with an added small solar panel as light sensor. 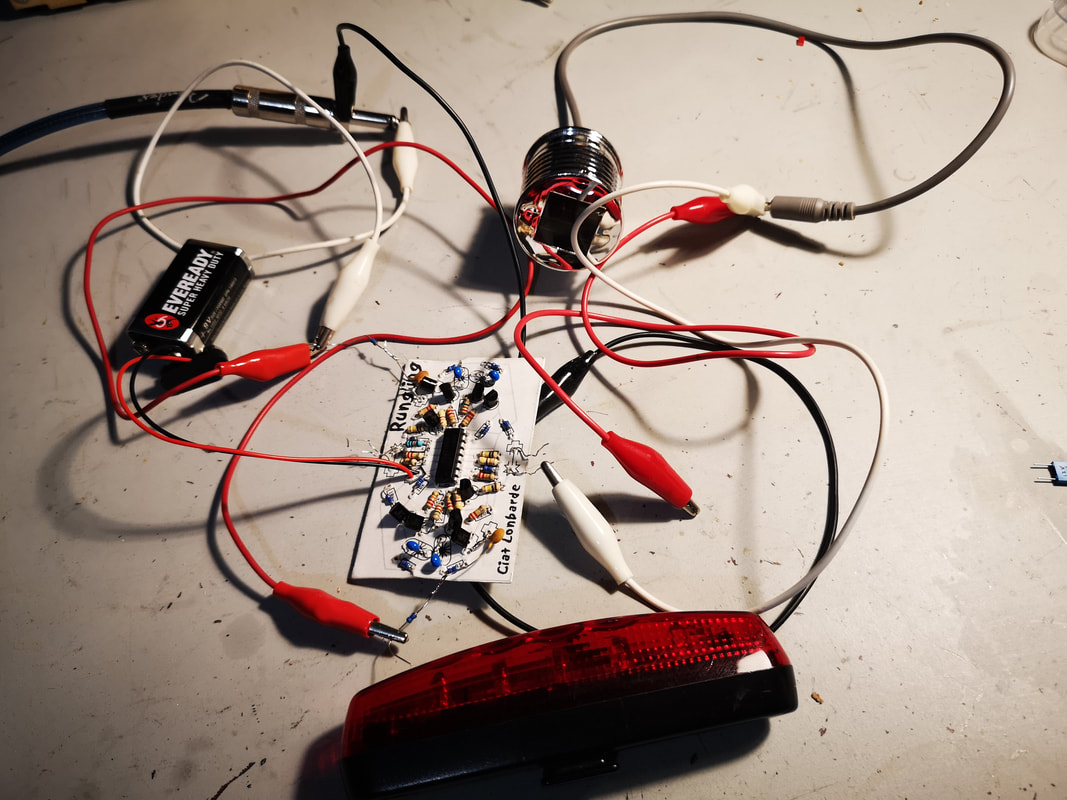 Next we are going to experiment more with solar and other circuits. We are also trying out partially solar-powered circuits. We have been looking at vintage electronics textbooks and websites for more inspiration and ideas about simple solar/audio circuits too. At the most basic level, a solar panel connected directly to a speaker or audio input can pick up light fluctuations and directly convert them to sound! 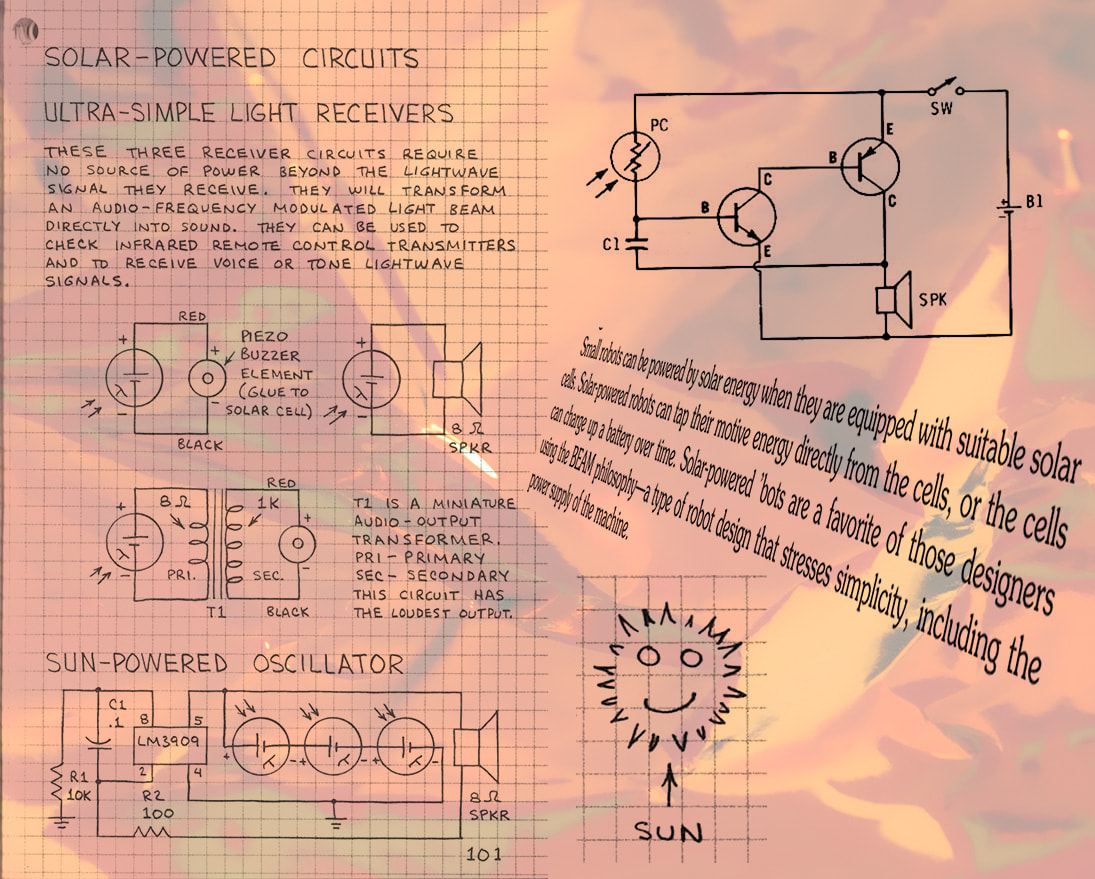 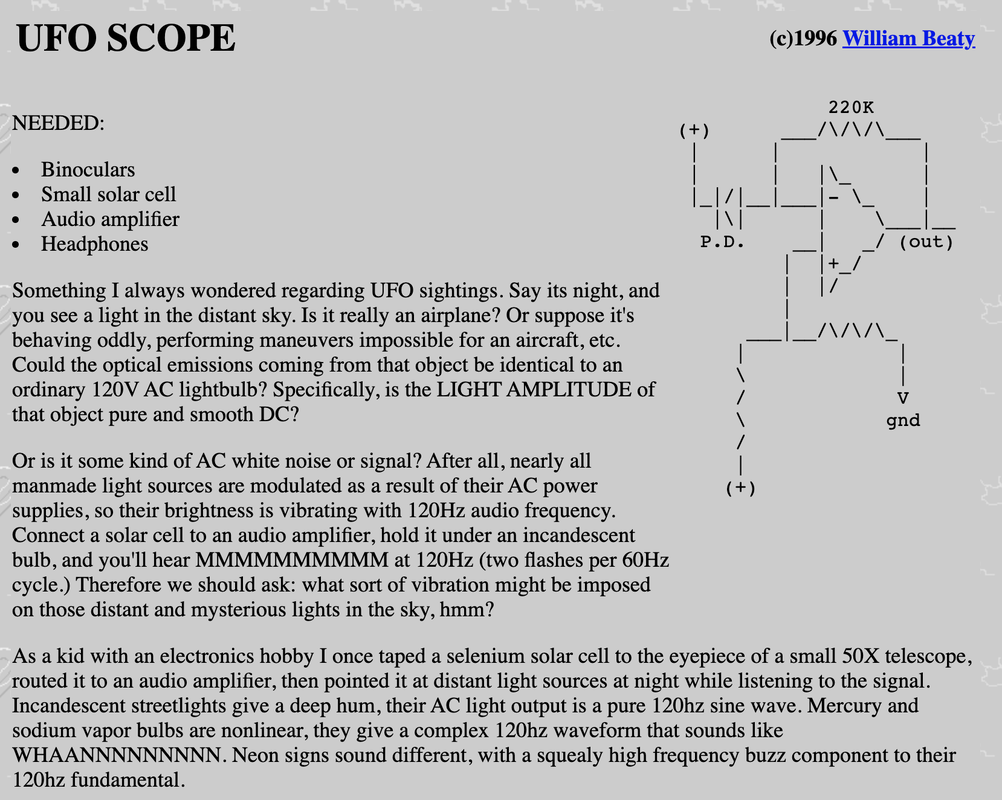 Sound on Mars"The Perseverance rover carries two microphones, letting us directly record the sounds of Mars for the very first time. Even though Earth and Mars are entirely different planets, it may be comforting to know that if you were on Mars, you might still sound pretty much like yourself. If you were standing on Mars, you’d hear a quieter, more muffled version of what you’d hear on Earth, and you’d wait slightly longer to hear it. On Mars, the atmosphere is entirely different. But, the biggest change to audio would be to high-pitch sounds, higher than most voices. Some sounds that we’re used to on Earth, like whistles, bells or bird songs, would almost be inaudible on Mars." https://mars.nasa.gov/mars2020/participate/sounds/ Below, Perseverance taking a selfie https://www.nasa.gov/image-feature/taking-a-selfie-on-the-red-planet  Sounds from Mars. I've (Lisa) already loaded these onto my sampler and had a few Mars sound adventures while using them with FX. The closest I have gotten to outer space apart from looking through the telescope. Visit the Isn'tses Etsy store to buy our psychogeographic noise synths, eurorack art panels and Isn'tses merch - isntses.etsy.com
 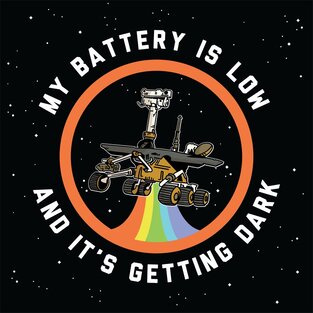 The Red Planet Rovers A planet of dunes and craters. The surface of the planet Mars is seemingly uninhabited except for the alien robots sent by humans to investigate and send back images to earth. The Machine Dies Opportunity lasted 14 years on Mars. The famous last words of Opportunity the Rover were "My battery is low and it's getting dark" and this became a viral tweet (we know this is a translation of the data not actual words). www.nationalgeographic.com/science/article/nasa-mars-rover-opportunity-dead-what-it-gave-humankind Solar Power and Energy The machines are solar powered, and something of an experiment as the Rovers have lasted far longer than anticipated according to NASA. Reading about them inspired an idea to create a solar or a partially solar powered synth. Hopefully we will not ever be in a situation where there is no energy but we like it as an idea or as an alternative to using the grid. The Sun as Collaborator Any light dependent resistor reacting to the light off the sun is effectively accommodating the sun as a collaborator, an accomplice in the act of making noises. Passive or not. Solar Panels can be used in a similar way to an LDR but can produce their own control voltages directly rather than just controlling an existing voltage. Nuclear vs Solar This is not a nuclear vs solar investigation. The main scepticism we had about Chernobyl when making the Chernobylizer was the govt/corporate negligence that led to the disaster. There is no doubt in my mind that another disaster at a nuclear plant will happen either due to negligence or as a result of a natural disaster similar to Fukishima. isntses.bandcamp.com/album/chernobylizer-sample-pack Never Clean Plastic has been found on Mars. A robot has died on Mars. Mars is no longer a virgin. Humans like things that are dirty and to extract, excavate and get things out from under a planets surface. The desire to go to the moon and to Mars is not only about exploration. They want the goods. To extract substances, materials, precious and rare things from the moon and from Mars. If the universe left it there, it belongs to humans. The Surface of Mars A mysterious and beautiful landscape devoid of human life. Dunes, valleys, craters and markings. The surface of Mars was until recent years untouched by humans but touched only by the hands of the universe itself. Formations developed over thousands of years by the elements and huge dust storms. River-like markings puzzle astronomers as they strive to learn more about this planet. Mind Expansion The machines on Mars enable us to see images of this planet, machines are expanding our minds. The first photograph of mars was actually a painting. Humans acted as a printer for machine data: 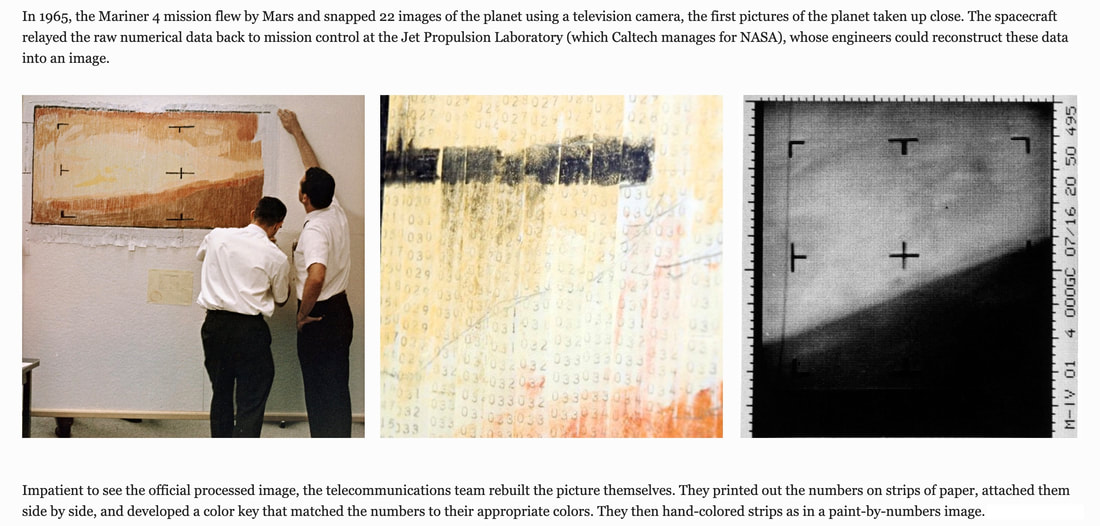 source: magazine.caltech.edu/post/mars-first-photo-jpl Where are the aliens? As in Ray Bradbury's "The Million-Year Picnic", we are the aliens, the robots are the aliens. Mars is not our planet.
 “Wildcat Ridge,” where the Perseverence rover extracted two rock cores and abraded a circular patch to investigate the rock’s composition. “Wildcat Ridge,” where the Perseverence rover extracted two rock cores and abraded a circular patch to investigate the rock’s composition. "A key objective for Perseverance’s mission on Mars is astrobiology, including the search for signs of ancient microbial life. The rover will characterize the planet’s geology and past climate, pave the way for human exploration of the Red Planet, and be the first mission to collect and cache Martian rock and regolith (broken rock and dust)." source: mars.nasa.gov/resources/26988/sample-collection-and-rock-analysis-at-wildcat-ridge/ A Robot Arm  "NASA’s Perseverance rover puts its robotic arm to work around a rocky outcrop called “Skinner Ridge” in Mars’ Jezero Crater. Composed of multiple images, this mosaic shows layered sedimentary rocks in the face of a cliff in the delta, as well as one of the locations where the rover abraded a circular patch to analyze a rock’s composition." mars.nasa.gov/resources/26995/perseverance-workspace-at-skinner-ridge/  Going to Mars
We are going to Mars. You can too, get your boarding pass. Join us To see our Synths Visit our Store www.etsy.com/shop/isntses Recently Isn'tses teamed up with Howard from Pillars of Golden Misery to play in Epping Forest. We were using a variety of small battery powered synths including the Fort Processor. There was a variety of natural noises in the forest, mostly bird sounds which we've incorporated into the music. The video incorporates the footage of several static cameras from different angles. There was no audience and no humans passed us as we performed, only animals who live in the forest. Because of the change in season and the chaotic nature of the forest we usually find that each time we perform in the forest it has a different feel and energy. Our noises did not disturb the wildlife as they continued about their usual activities. We were somewhat sheltered from the rain in this spot but at some point the rain did come through the trees and onto our equipment, luckily we had the recorder inside a plastic bag to protect it. Recorder: ZoomH6 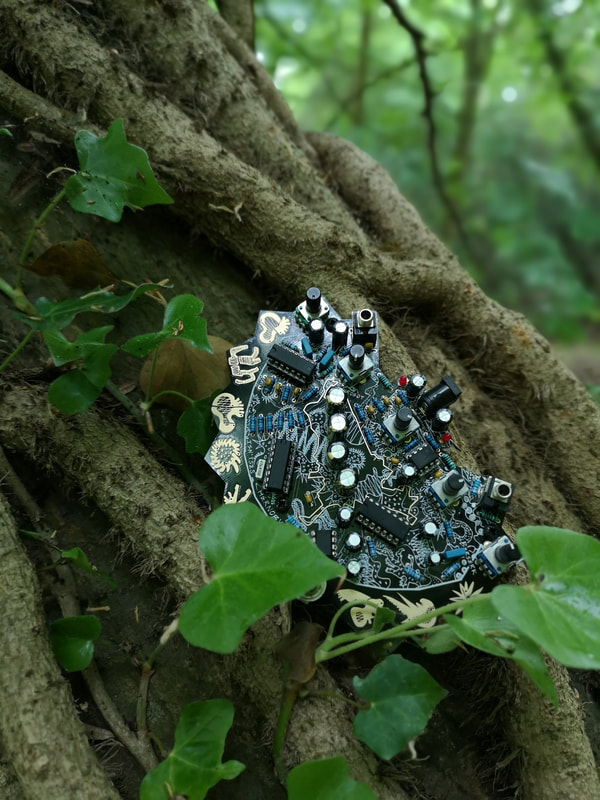  Previous performances in Epping Forest. Note: we are not responsible for any adverts on our Youtube videos. Youtube have used adverts without our permission. Here we are using two of the Chernobylizer synth on the beach in Borth, Wales.  We are happy to announce that our Chernobylizer psychogeographic noise synth is now available to buy as a DIY kit from the excellent synth kit store Thonk: https://www.thonk.co.uk/shop/isntses-chernobylizer/
They also stock our previous circuit, the Fort Processor: https://www.thonk.co.uk/shop/fort-processor/ If you wish to buy a fully built version of either of these, visit our Etsy store: isntses.etsy.com All systems go. The beast is released. Fully working and presented here in a forest. This has been a really mind blowing noise quest for us developing this synth, and we are really whacked out of our noise minds. We have the Chernobylizer available here: https://www.etsy.com/uk/listing/915009651/chernobylizer-custom-made-synth-noise We have also got a Noise T-shirt in our shop: https://www.etsy.com/uk/listing/942427775/ 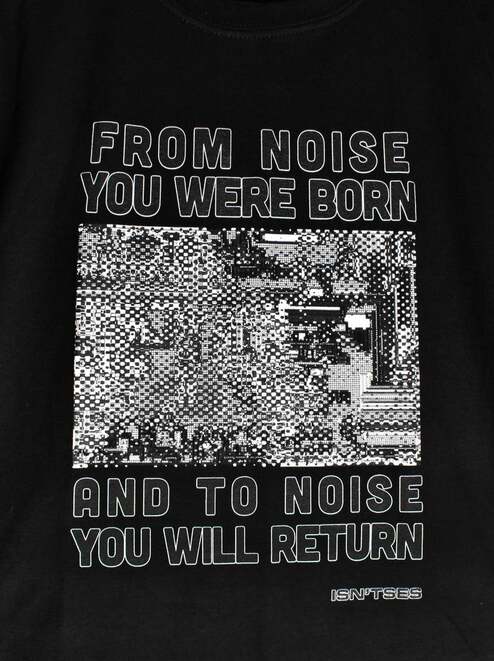 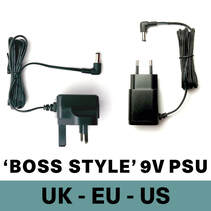 To power the Chernobylizer you will need a 9v Centre-negative power supply such as this one from from Thonk which we recommend: https://www.thonk.co.uk/shop/9v-power-supply/ 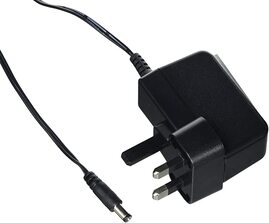 ...Or this one from Amazon: https://amzn.to/2St1i9i
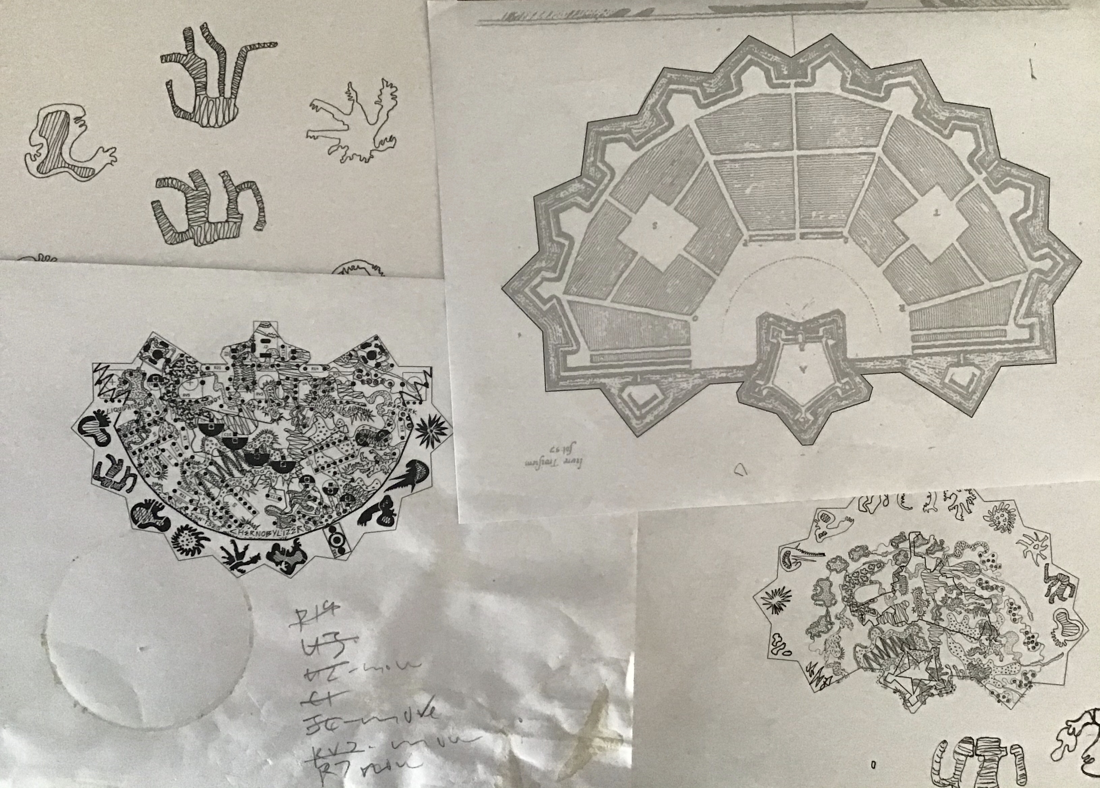
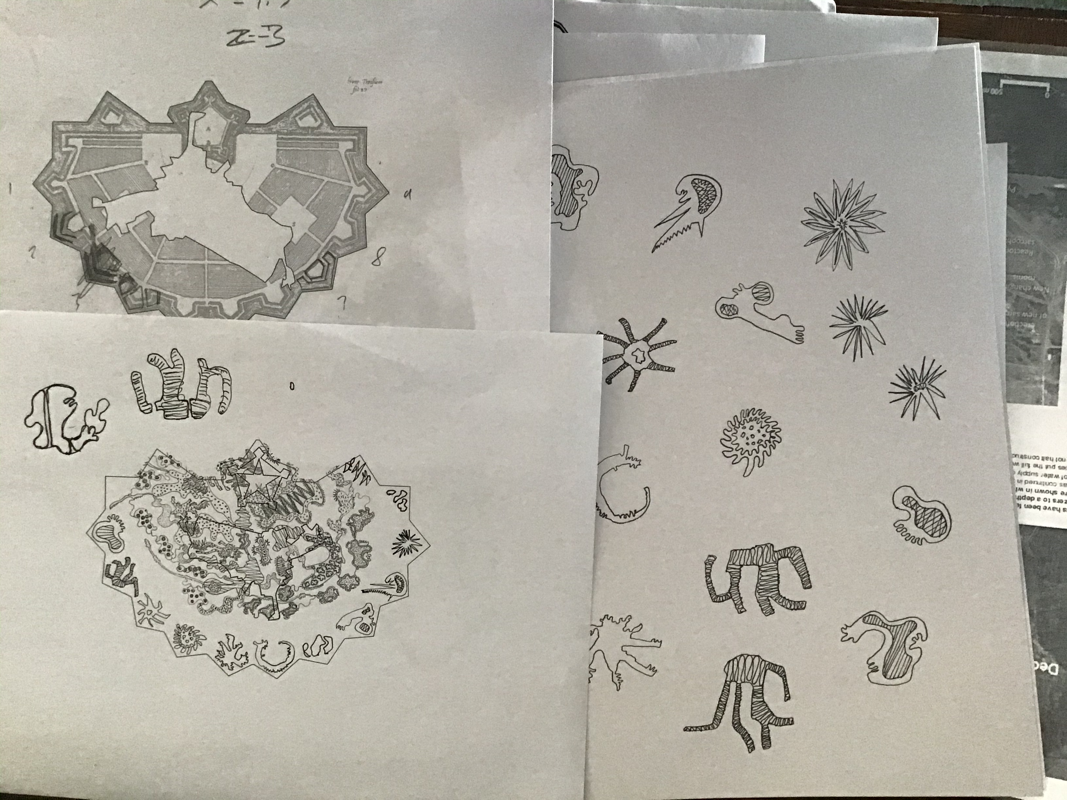
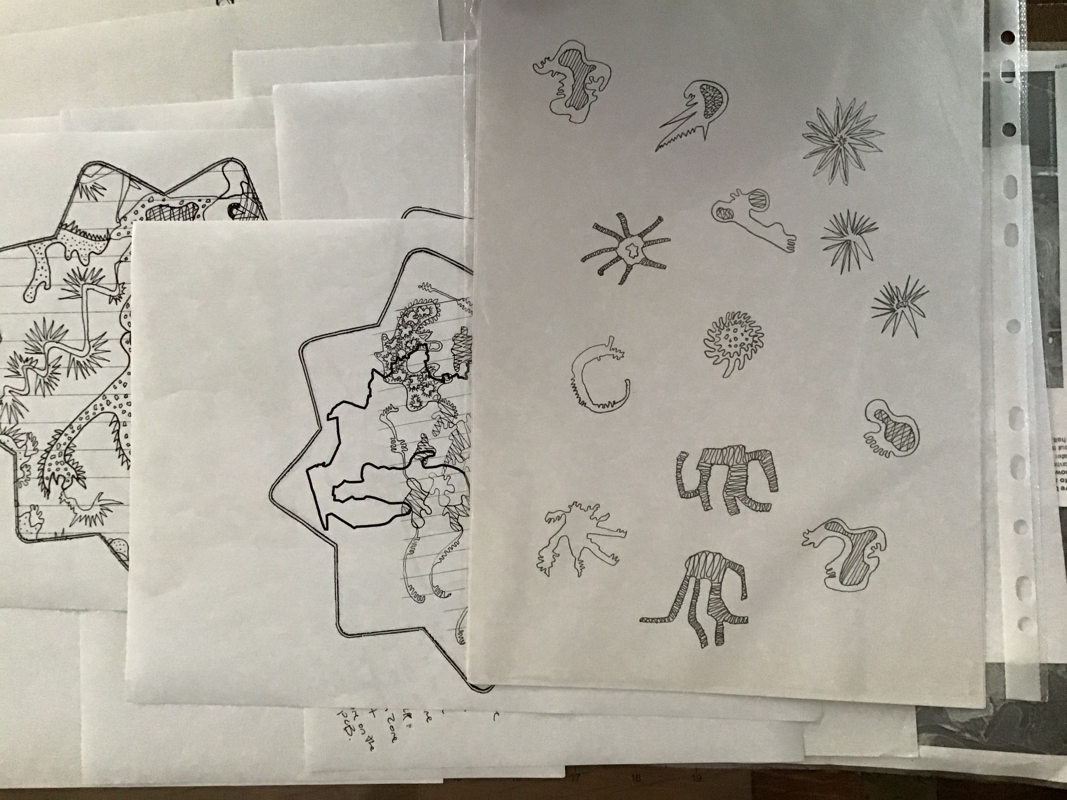
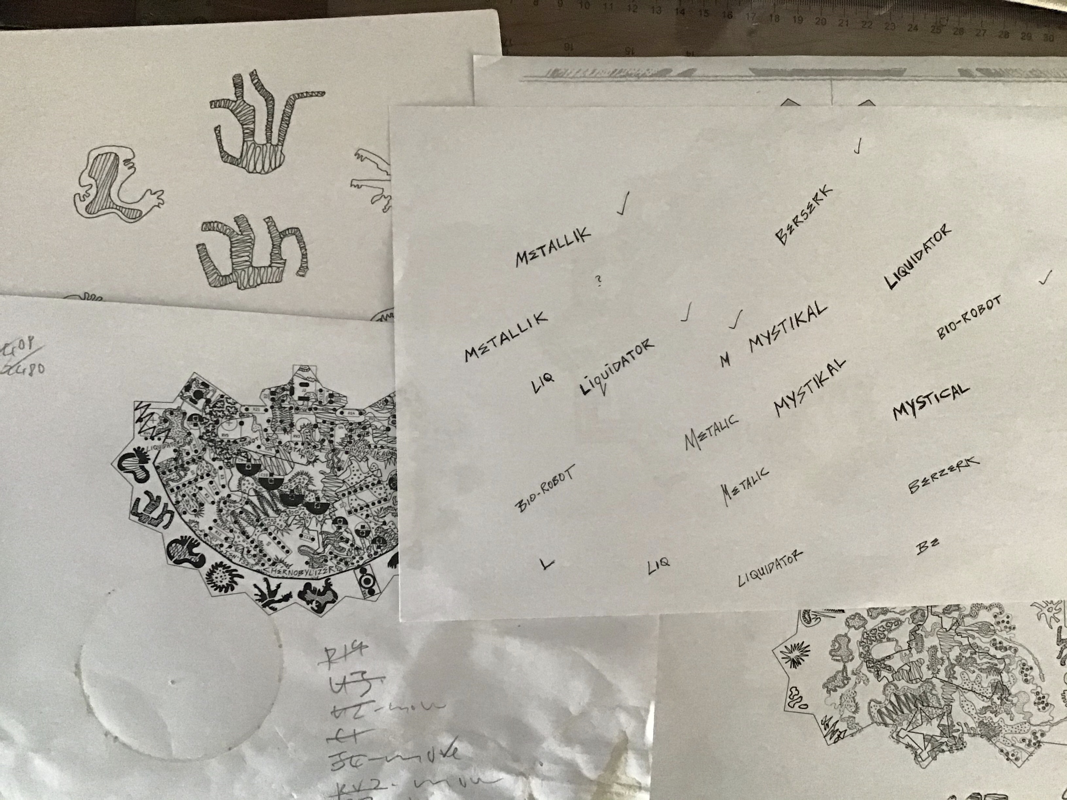
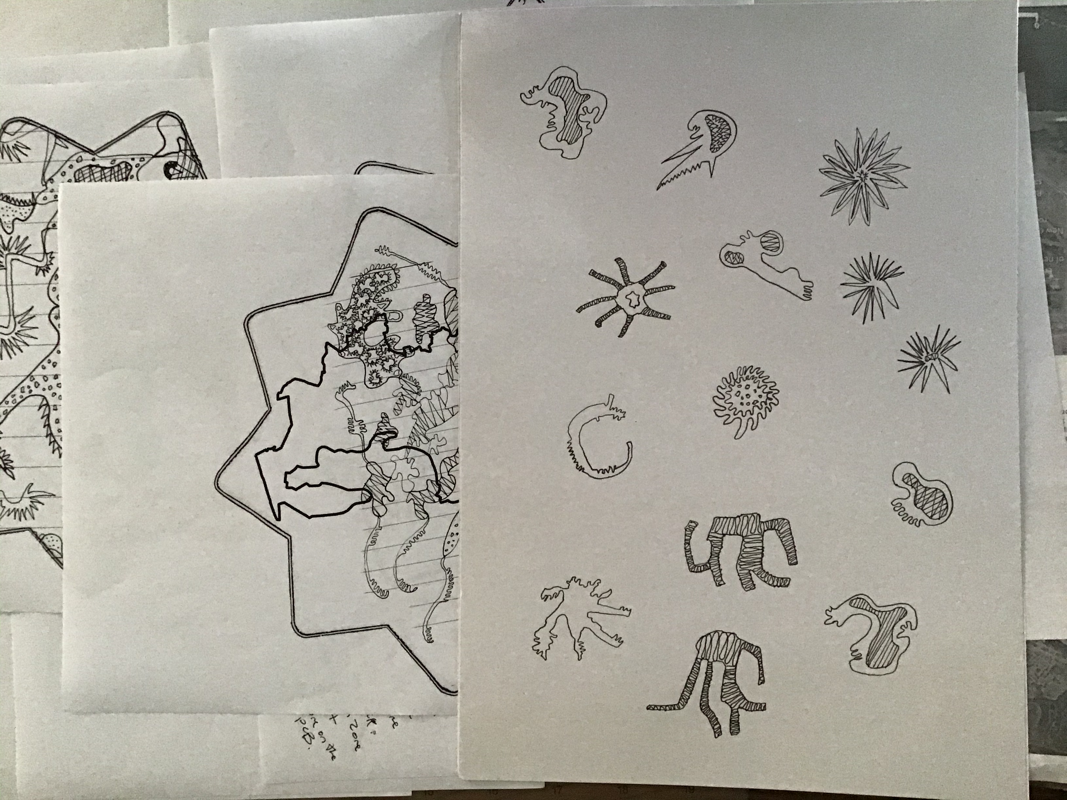
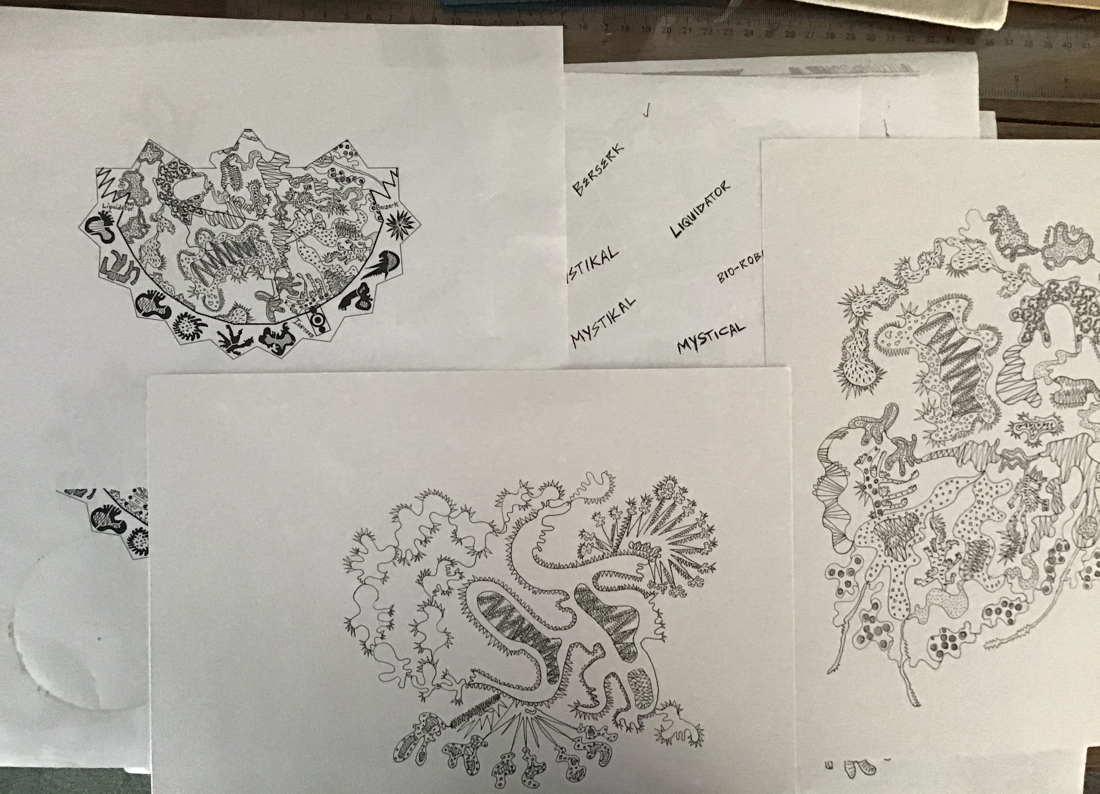
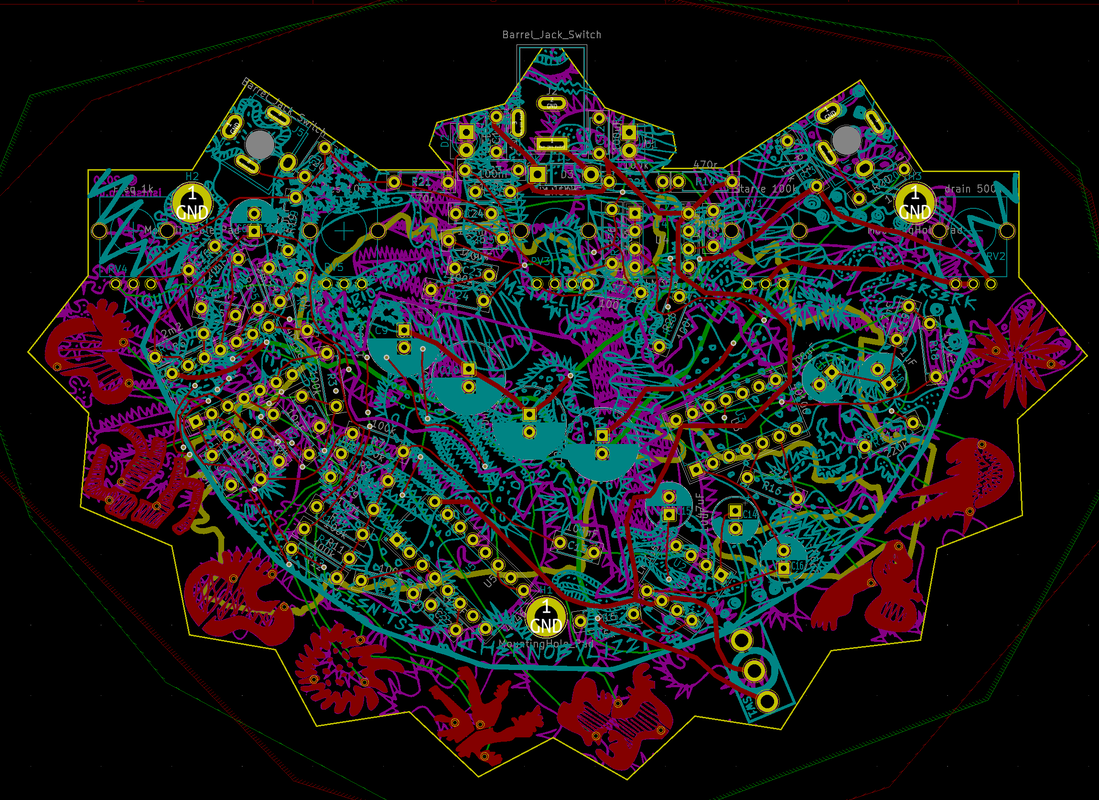
Chernobylizer - designed by Lisa McKendrick and Tim Drage © 2020 The drawings for the Chernobylizer were based around the shape of the exclusion zone and the decontamination zone. The descriptions by those involved in the Chernobyl clean up, of radiation causing electrical equipment to fail causing them to stop working seemed very interesting to me - That an invisible source of energy could cause a machine to stop working. It only makes you wonder what effect it has on the human body. As we know there are radiation burns and more obvious signs but there are also more invisible things that happen later. As radiation can affect DNA which leads to mutations I was interested in what these mutations might look like and explored these further in my drawings. The touch pads are something like mutated forms, and as they are central to the playability of the synth I wanted them to have a voice. What message do they have for us? This can only be experienced by the player’s own human contact with the device. Both at that time when human contact with the radiation was highly dangerous, but also during the current crisis where we have become transmitters and spreaders of disease, our human touch has become something to be feared. The touch pads welcome you back into the touchy feel of your own body interacting with another and here it is not something to be feared. Rather the capacitance of your own body and its ability to be a conductor of electricity allow an interaction to take place between human and machine. When trying to picture radiation I imagined that radiation had teeth, invisible and sharp eating away at the very fabric of a victims genetic make up, changing them, transforming their genetic lineage. It seems ironic that the method that we use to create energy would come back and bite us with these invisible teeth reminding us that we are flesh, blood and circuitry subject to the laws of physics. That radioactive waste, as impossible as it is to neutralise, is the result of the very energy that we employ everyday. We employ its creative and destructive mathematics and chemistry, its splitting of atoms. I am no nuclear physicist and I do not have the language to describe the process accurately, but I have imagined, through my drawing, the shapes of this transformation and the resulting energy that powers the device. I think of our sun and the many other suns caught up in a nuclear process of creating and maintaining energy and I think of stars that die when they finally burn out. Perhaps for a moment while feeling the full force of radiation there is the Mystical feeling of pure energy beyond the fragility of the human body. As with most noise and experimental devices that I’ve played, it has always been the interaction with pure unclassically trained energy which I find most interesting and the unpredictability of the sound, oscillating in shapes as it passes through filters, is held within capacitors then released through a gate. With the added human interaction as energy conductor the player can be part of the circuit, a component of its unpredictability. It is a reminder that we are part of something bigger and complex, that we are always part of a system and held by laws of the universe at times Berserk. I hope when playing the Chernobylizer that some of these ideas are transmitted and reinterpreted by the player in their own idiosyncratic way. Drawings: Lisa McKendrick 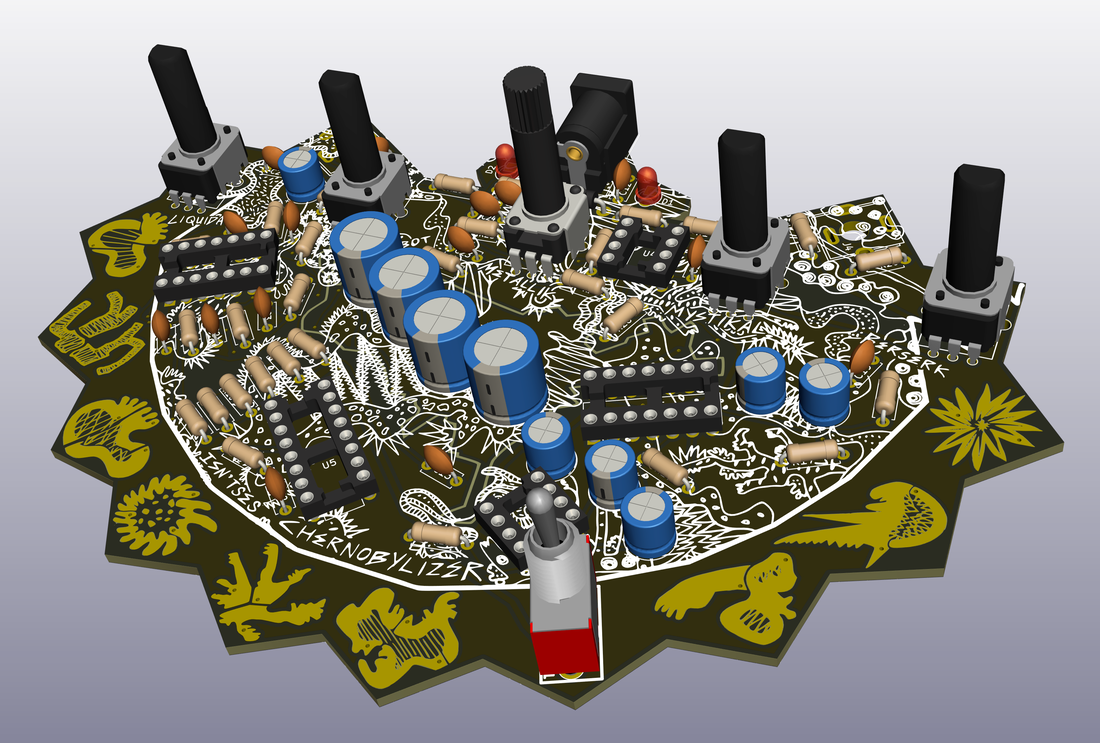 The placement of the components was something that we wanted to kind of resemble the Chernobyl plant. The large capacitors reference the four nuclear reactors. These capacitors are central to the draining sound that can be heard in the instrument as they store current and then slowly drain power from the main oscillators when the switch is turned off. The five knobs at the top are like controllers overseeing the whole site/circuit and bring attention to the human actions that controlled the blast of reactor 4 from the control room. The touchpads naturally work well at the outer edges of the PCB for easy access, and serendipitously there turned out to be the exact number of them to fill the triangles around the fortification layout we used for the PCB shape.
We have been playing around with the prototype now for a couple of weeks both to see if it works and how functional it is as an instrument. We are making a few modifications to correct some of the circuit problems that were encountered but are happy to say that the touch pads work very well as does the power starve function. The filter section of the circuit isn't working as it did on the breadboard so we will be correcting this for the final version. Exciting news about Isn'tses forthcoming noise synth, it now has a name - "Chernobylizer" - and the initial prototype PCBs have arrived! Lisa's artwork has come out looking great, we are going to build one soon and test that everything works properly. Once we have it working we will be selling them as a built synth and also as a DIY kit. We are very happy with the quality from AllPCB, who also manufactured the Fort Processor boards for us. Below is an unboxing video showing the PCBs for the first time: We are also glad to announce that kits to build our other synth, the Fort Processor, are back in stock at Thonk. You can buy one at https://www.thonk.co.uk/shop/fort-processor/
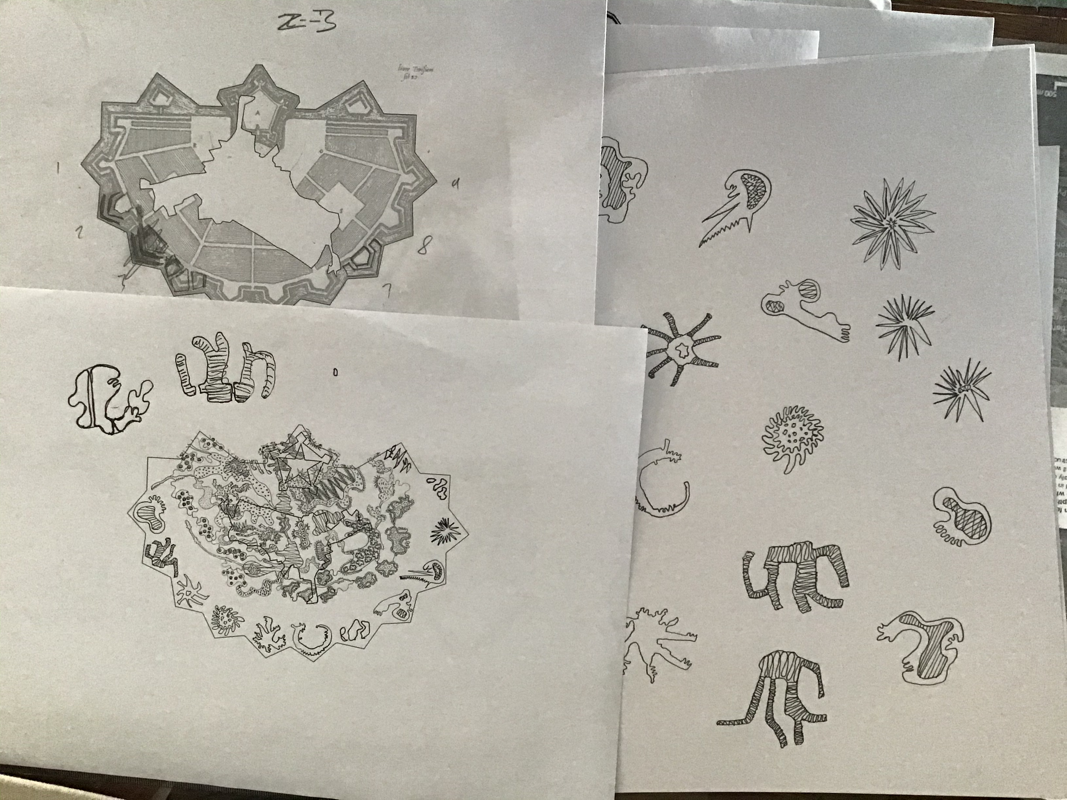
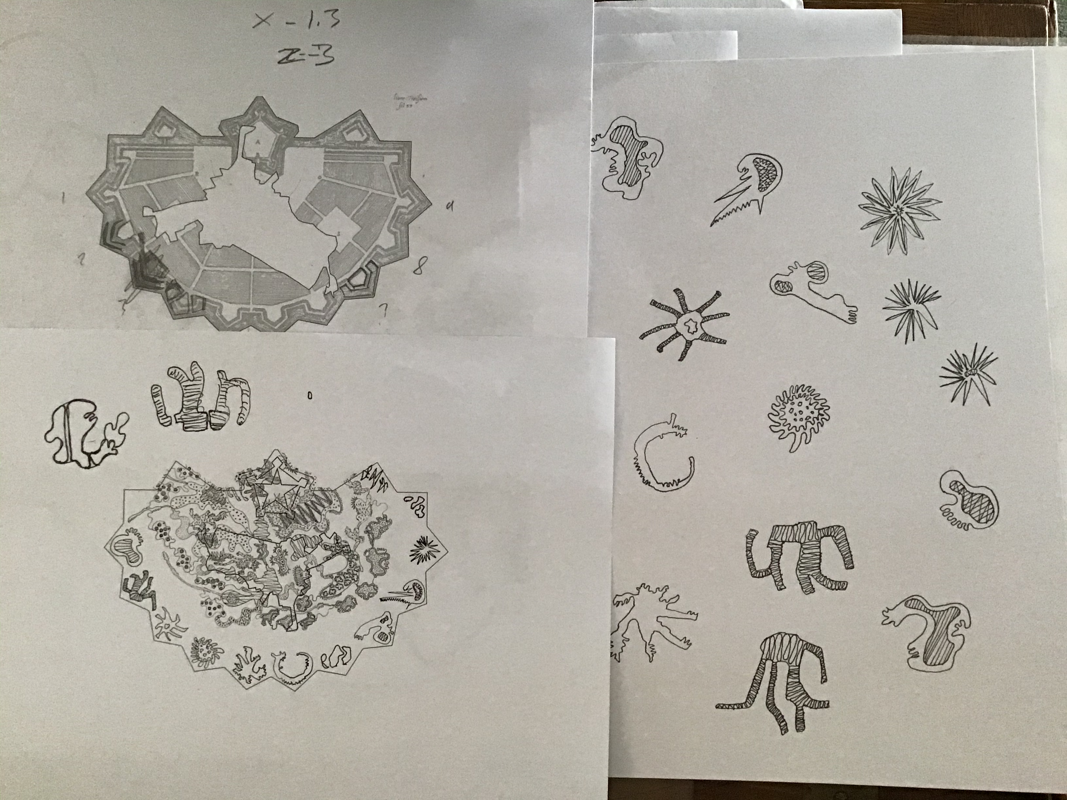
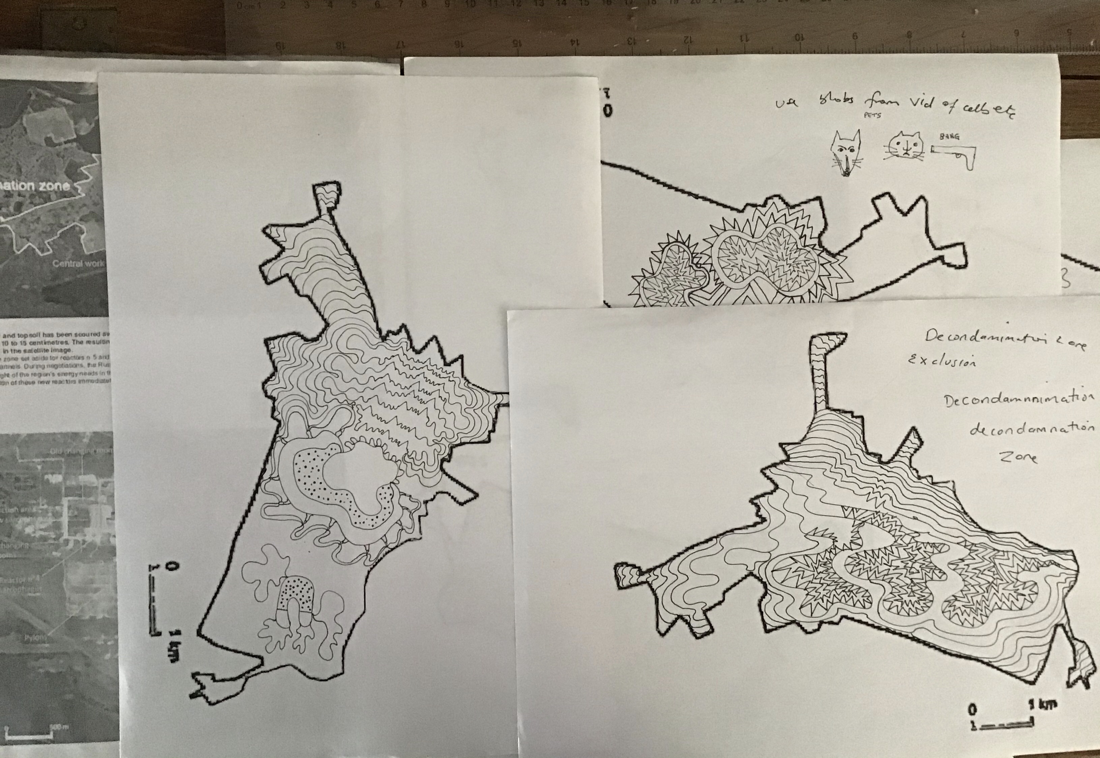
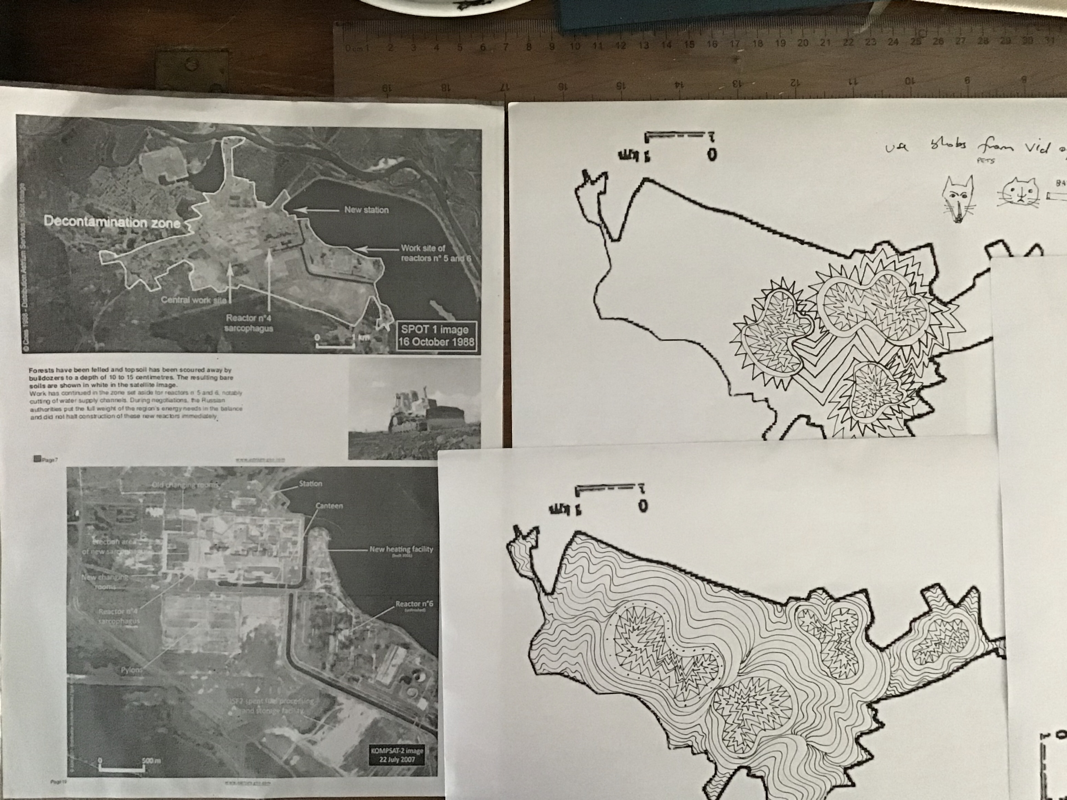
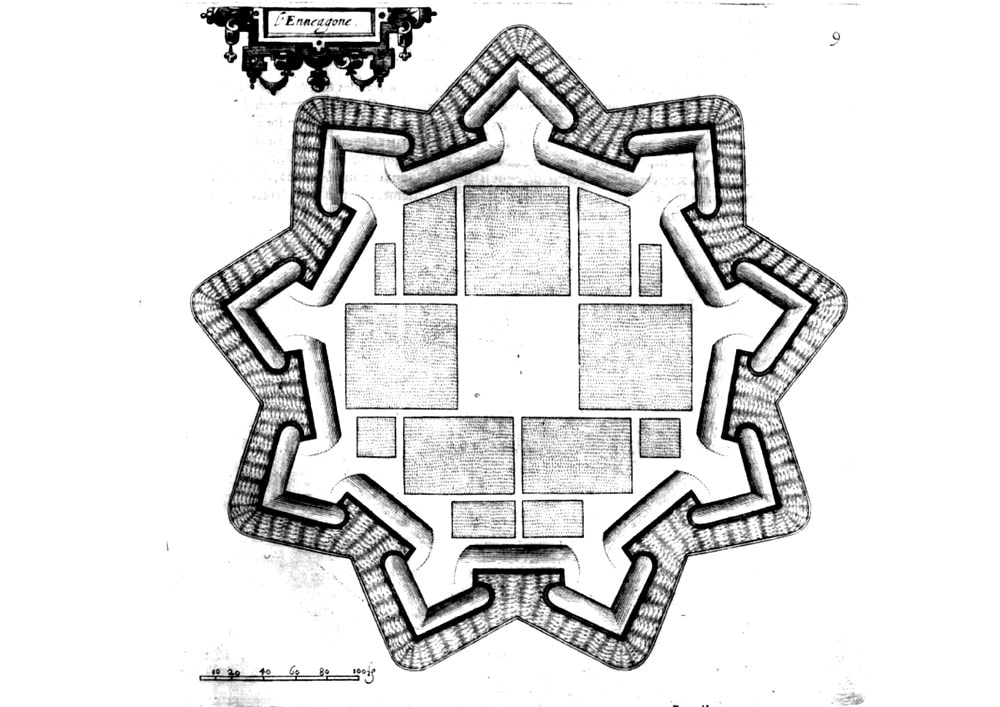
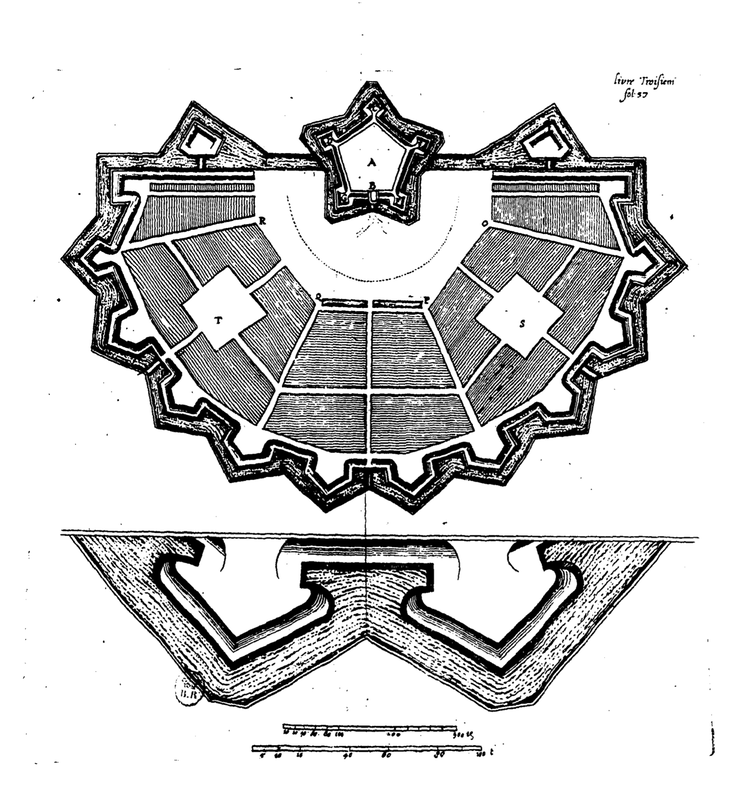
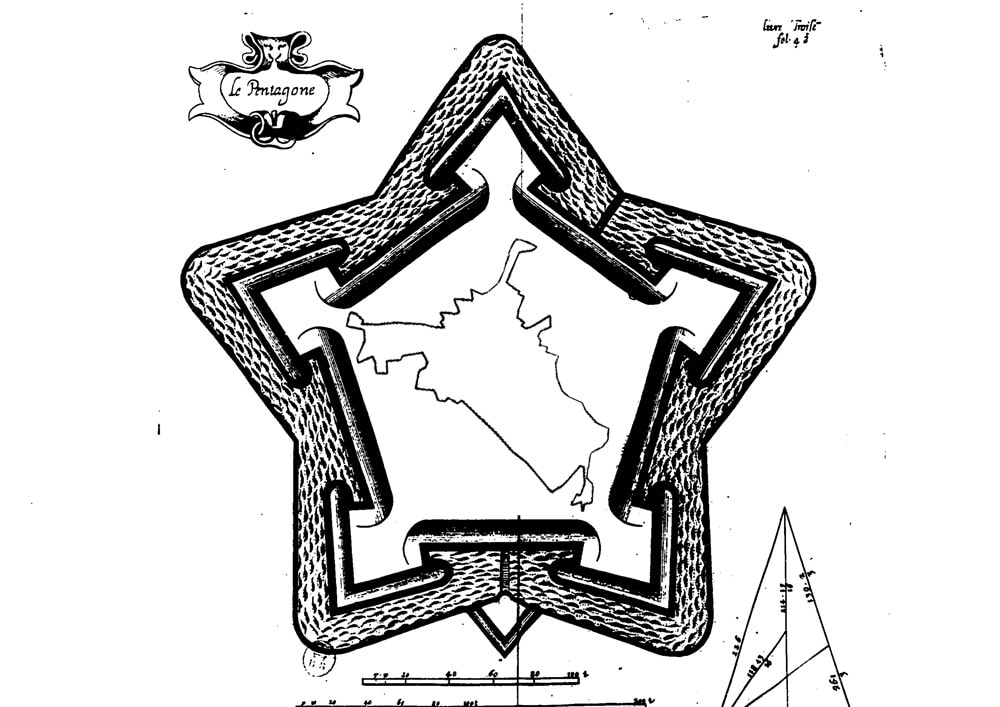
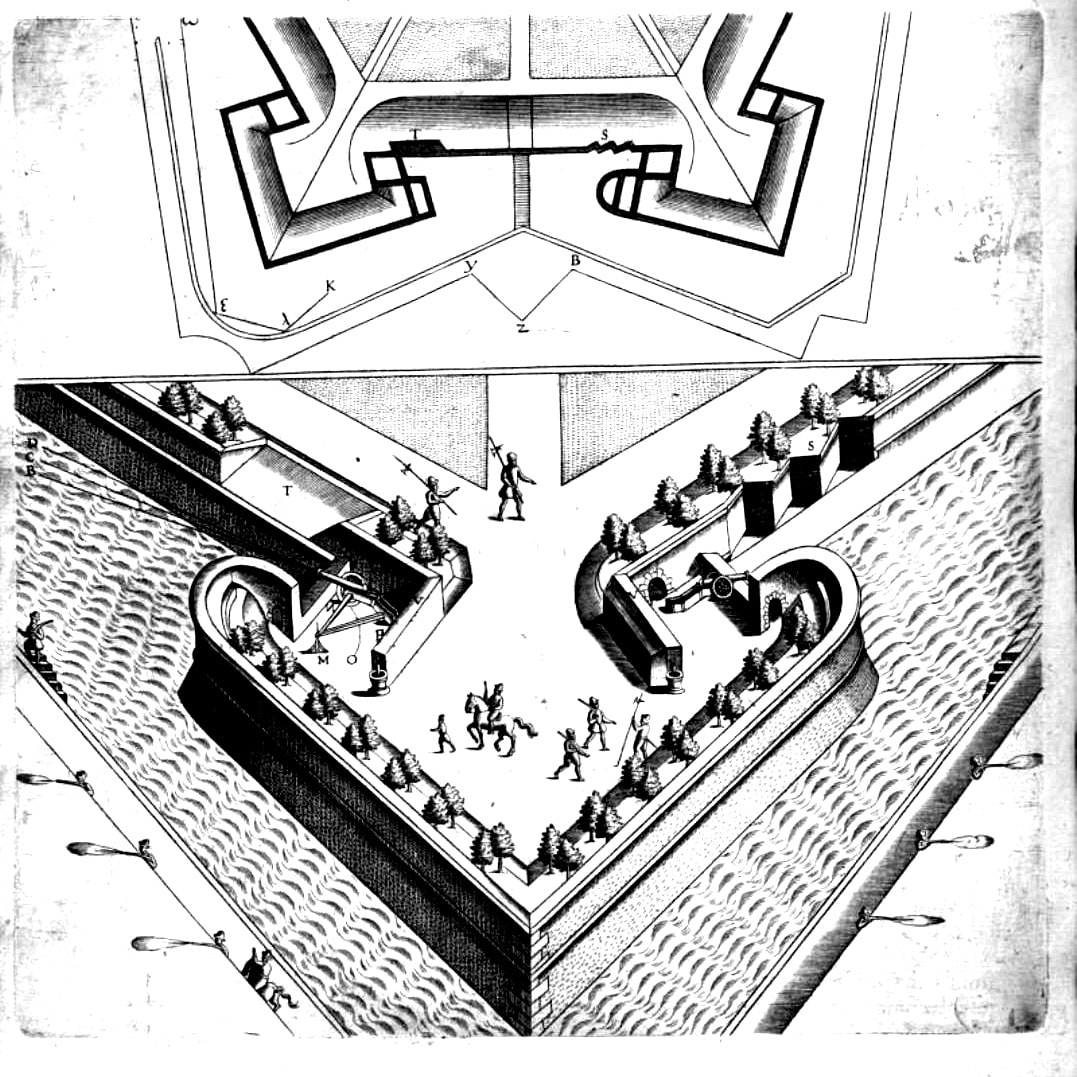
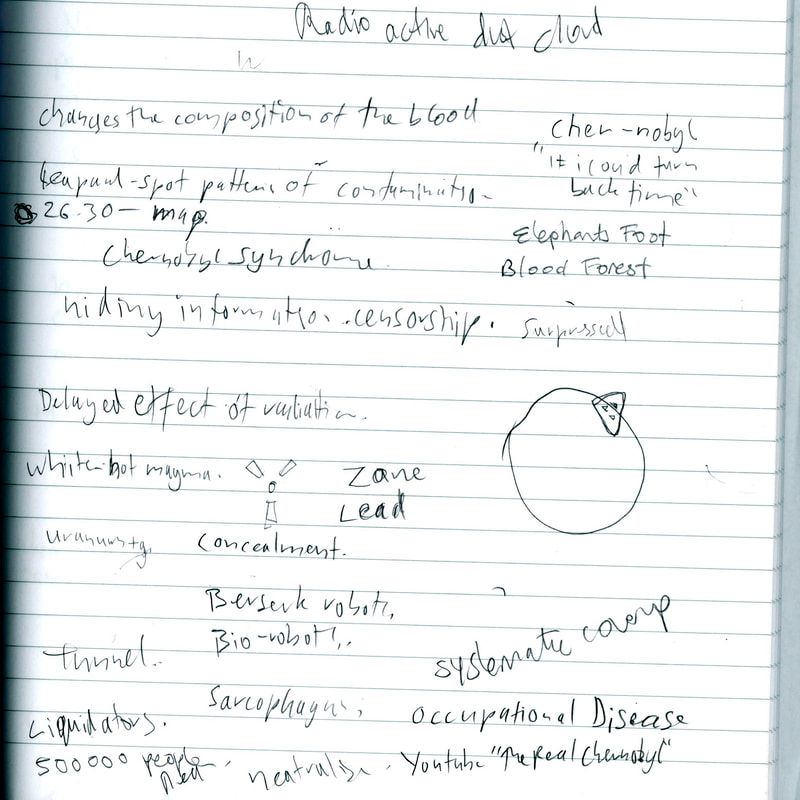
Chernobyliser ©2020 designed by Lisa McKendrick & Tim Drage We went out and experimented with reading radiation but I think it’s a not very accurate phone app. It was interesting to get completely random readings. The reading under the pylon was quite low while the reading by the river was very high. This was more of a psychogeographic exploration than a scientific experiment, but the main thing is that even at the highest readings the levels at Chernobyl would have been 1000s of times higher. It would be nice to have an actual Geiger counter but they are quite expensive and we quite like the idea of using an EMF-emitting phone to read EMF radiation.  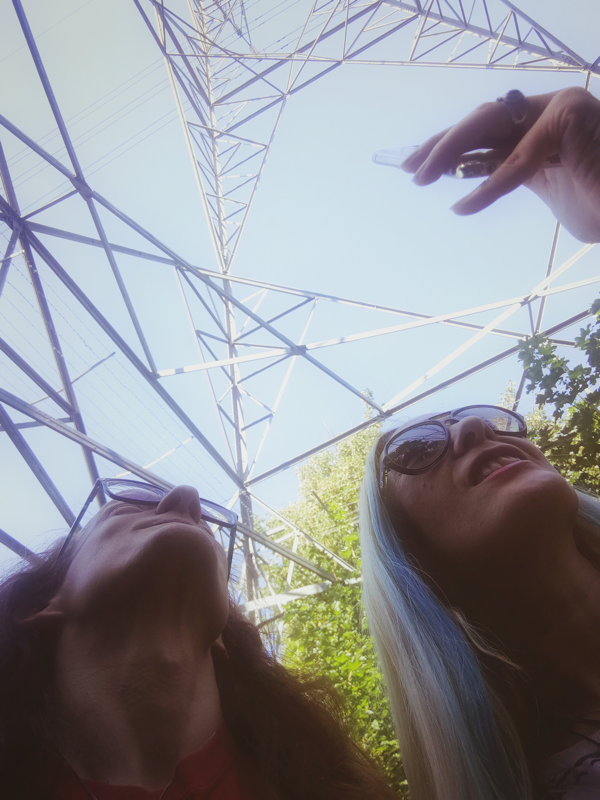 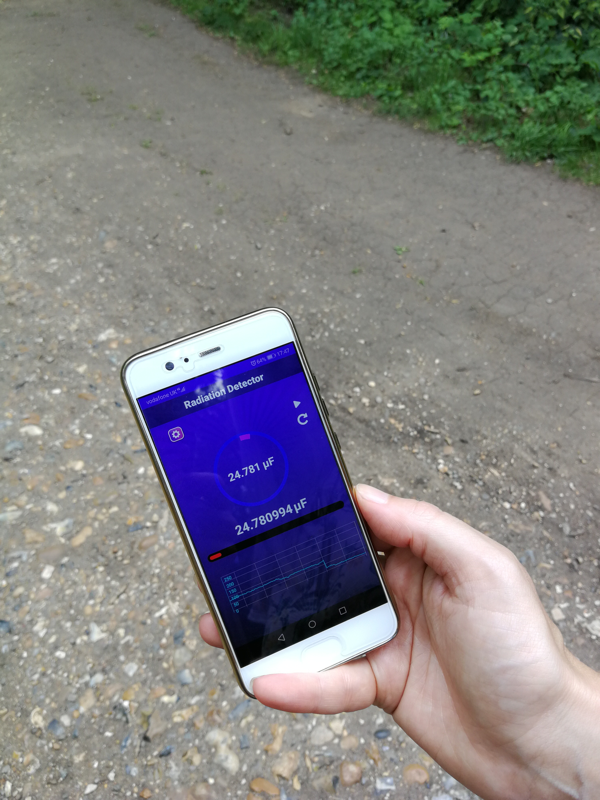 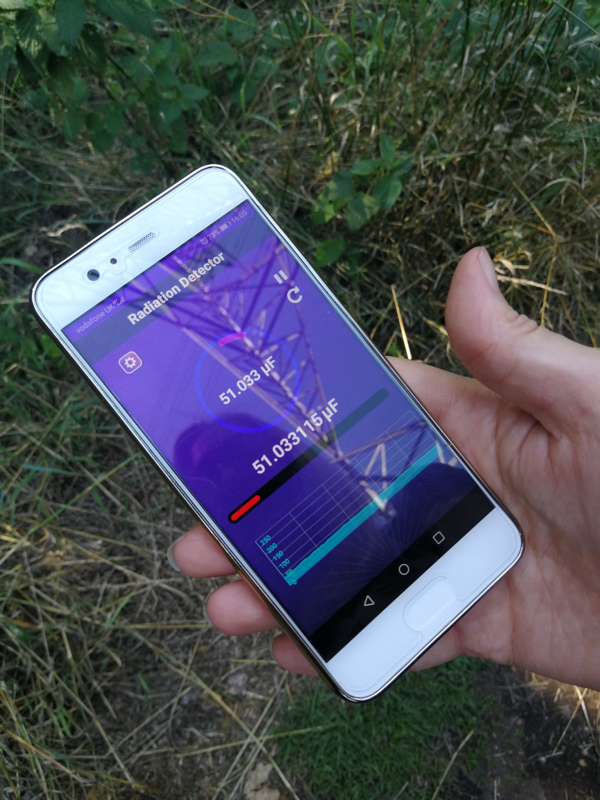   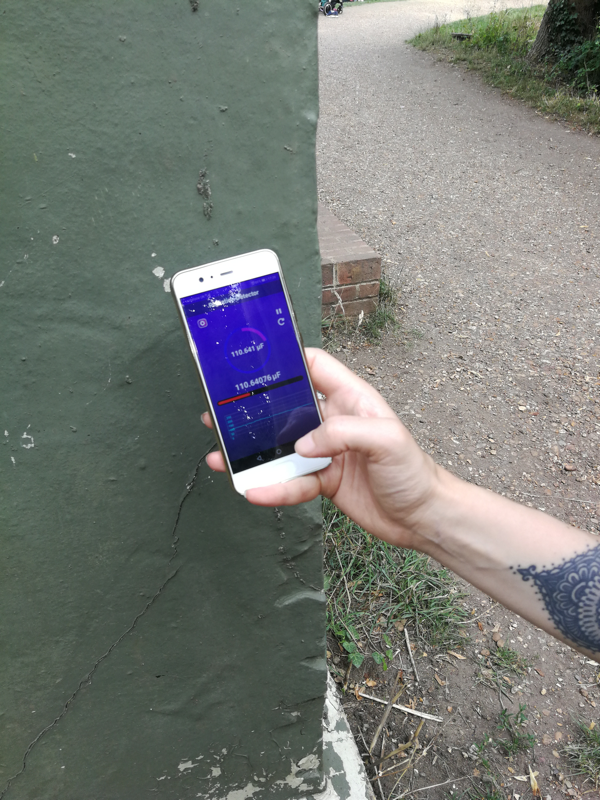 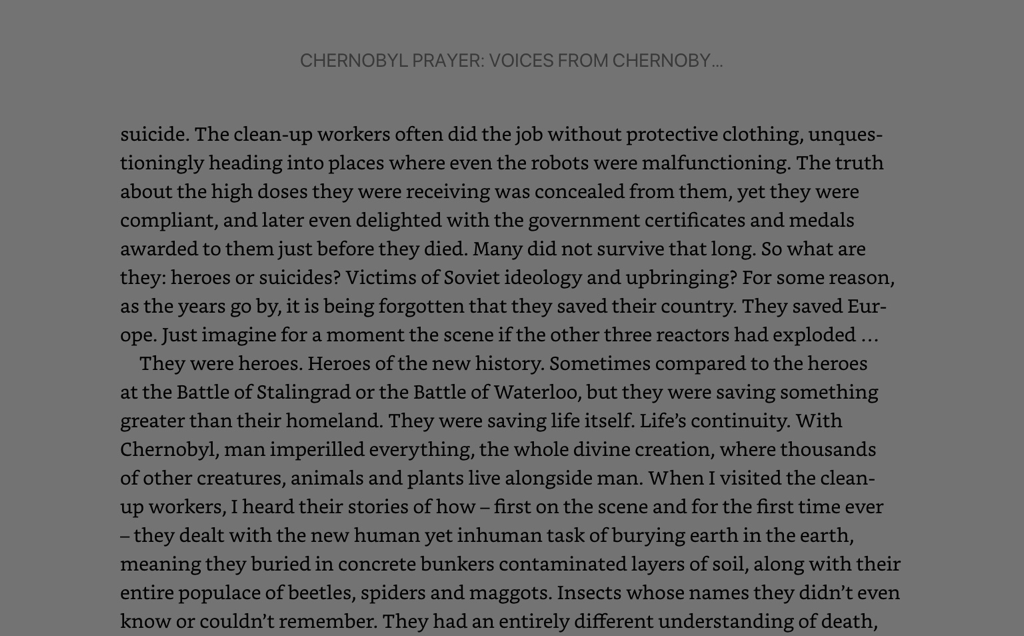 Extract from Chernobyl Prayer, a book recommended to us in our last post which is a very interesting set of memoirs by people living in or affected by the exclusion zone. The Shape of the Synth The interesting thing about Chernobyl is that the story is never quite told. There is missing information about what really took place. This element of mystery gives the whole thing an added layer of intrigue. It's interesting that the May Day celebrations still went ahead despite the high levels of dangerous radiation, and that all footage of the parades has now disappeared from the Ukraine national archives: time.com/4313139/post-chernobyl-parade/ When we built the Fort Processor it was based on Newhaven Fort. Since then we have looked at other fortification layouts and discovered "La fortification démonstrée et réduicte en art", a diagrammatic book, by 16th century mathematician Jean Errard. The drawings in this have helped us form a basis for the shape of the synth. The fortification surrounding Chernobyl took the form of lies, cover ups and untruths that still persist today. Part of the cover up of the true impact included not having a system to track the deaths and labelling deaths as something other than radiation sickness. As we now know the effects of radiation can manifest themselves much later as cancers, deformations, mutations of cells, thyroid illness, stroke, heart failure. As recounted in the videos in our previous post, the Chernobyl liquidators suffered with their health for the rest of their lives. In many ways we have two disasters, one is the explosion itself and he other is the fortification surrounding the truth. It is only because the survivors of this disaster have been so vigilant with telling their stories that we form a realistic picture.
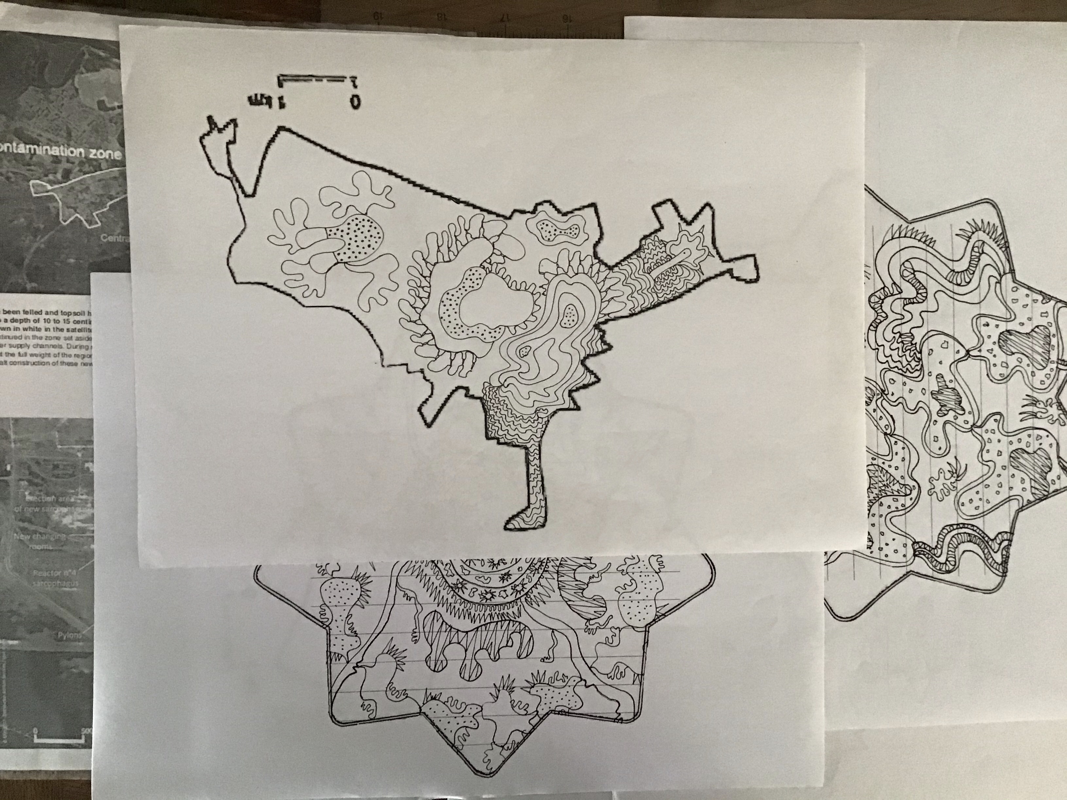
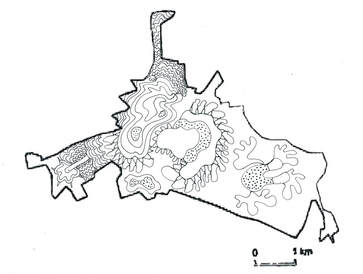
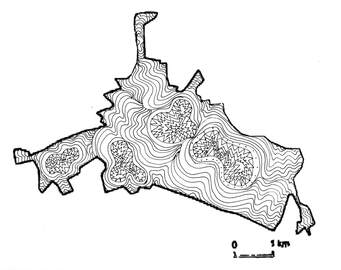
The shape of the decontamination zone would have proved problematic as a PCB and liable to break or awkward to balance when playing. But we wanted to keep both the shape of the decontamination zone and the exclusion zone within the artwork and this will be incorporated into the design and shape. The shapes seen in Jean Errard's book are reminiscent of sacred geometry. This helps us to expand our esoteric ideas around the concept of a noise synth as an esoteric instrument. Interestingly when asked what it was like on the roof of Reactor 4, photographer Igor Kostin, who went up there to photograph the Bio Robots at work, said "I was struck by the mystical feeling there”. Other people involved also were known to describe the sky as having a beautiful glow. 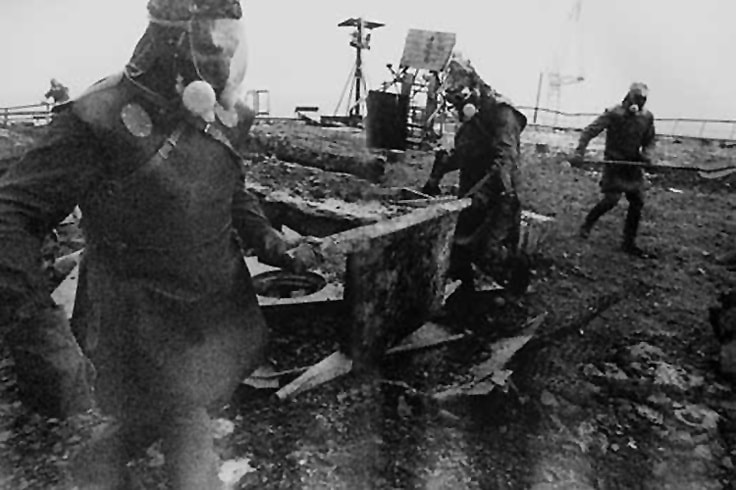 The 'Bio-robots' at work, photograph by Igor Kostin. https://atomicphotographers.com/photographers/igor-kostin/ The Circuit Initial Phases
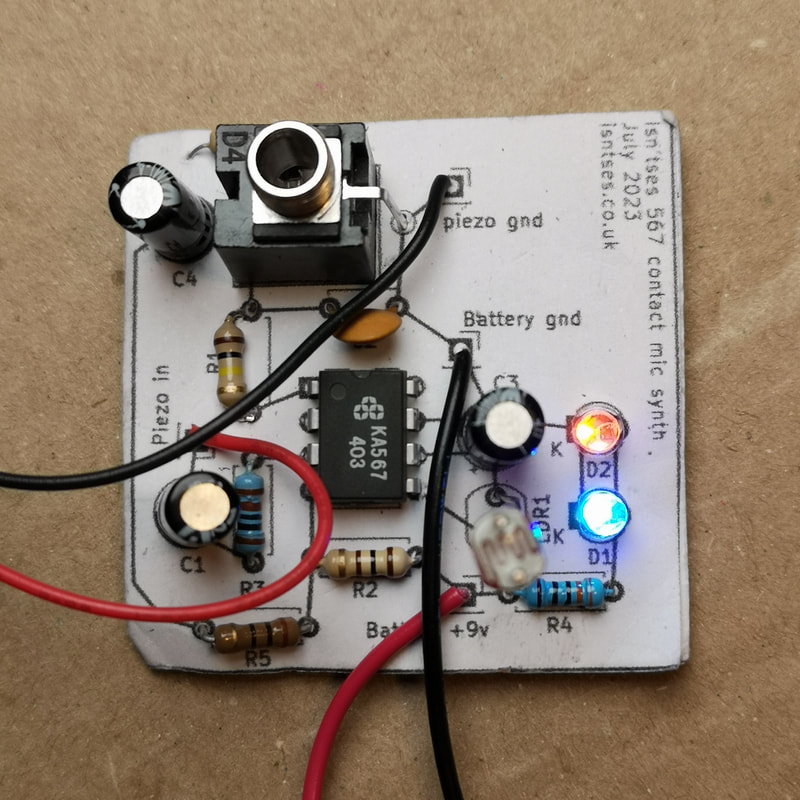
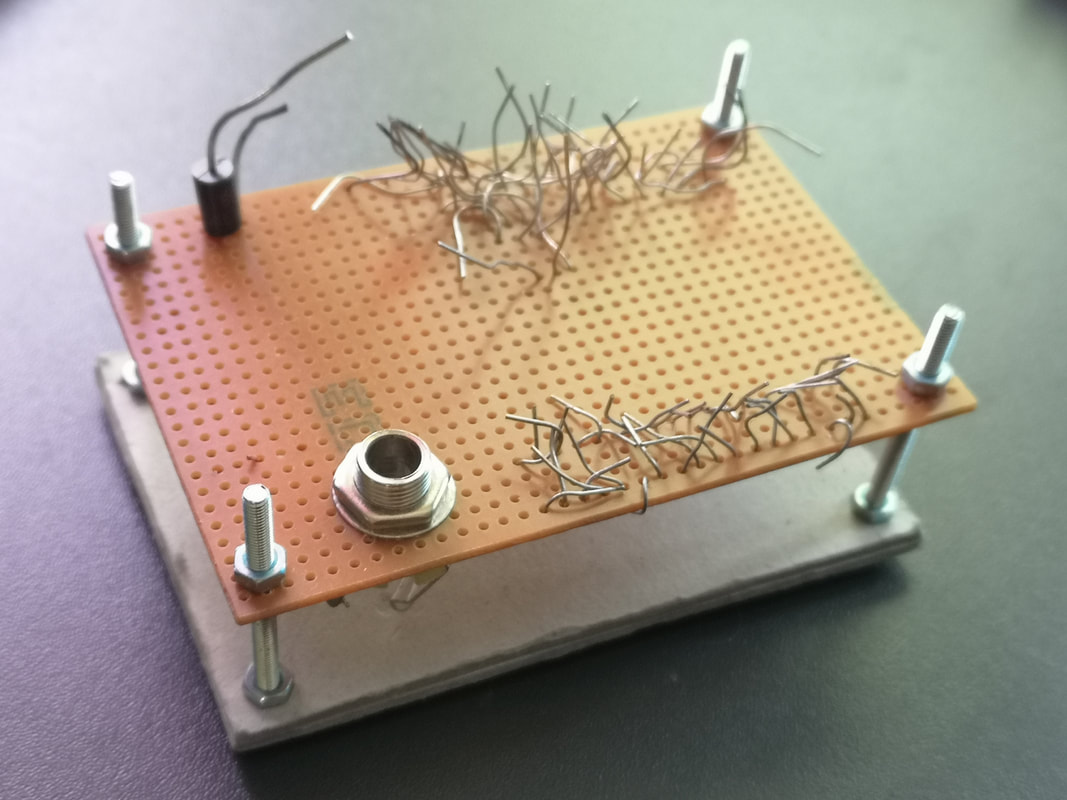
Here we are experimenting on breadboard with finding a distorted clicking noise which sounds like a geiger counter reading high levels. It is reported that the radiation meters available to Chernobyl workers only measured 500 roentgen but that the levels were off the scale, probably in excess of 1000. The initial sounds which we found were ok but we felt it needed something else as this geiger counter sound was not interesting enough on its own.We decided to try a circuit with power starve and drain. The large capacitors are suitable for this and effective at creating a gradually changing, draining noise similar to the sound we imagine Reactor 4 would make when it was turned off and then turned on again right before the explosion. We also added a switch so that this section could be on or off. The design we had in mind would have a lot of touch pads around the edges of the PCB. Here we test a mockup of touch-controlled oscillators. These prototype touch pads are made from stripboard. In this photo we are trying the synth out thru a filter pedal in order to decide whether we should add a filter section. This was very effective and added another dimension to the circuit and improved the overall playability of the synth. 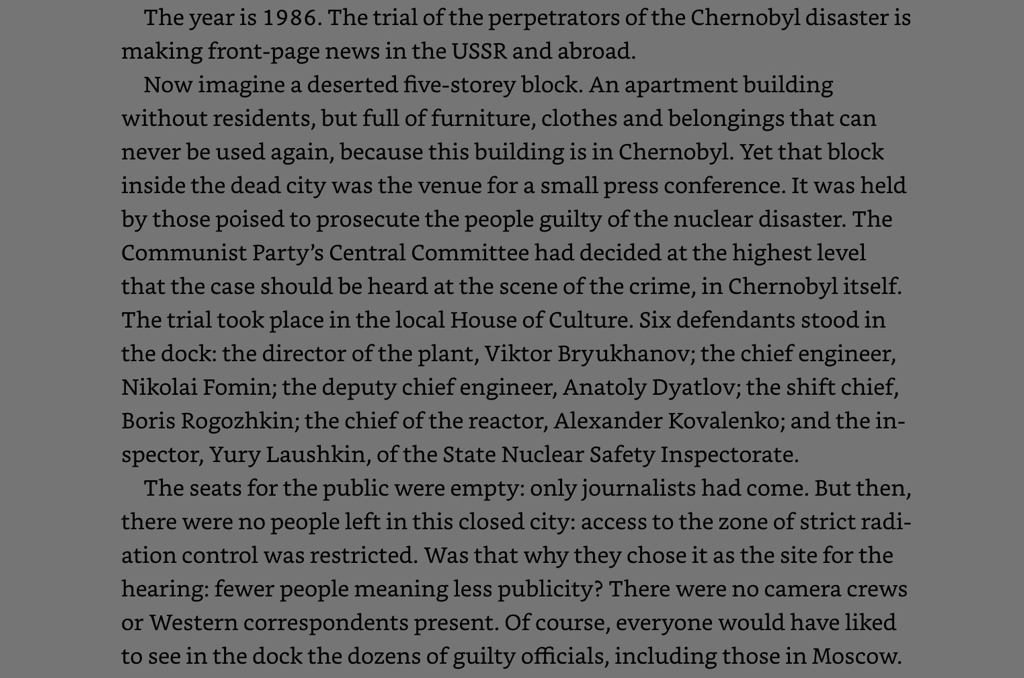 An extract from Chernobyl Prayer. It shows how they had the trial on the Chernobyl site. This is very strange.
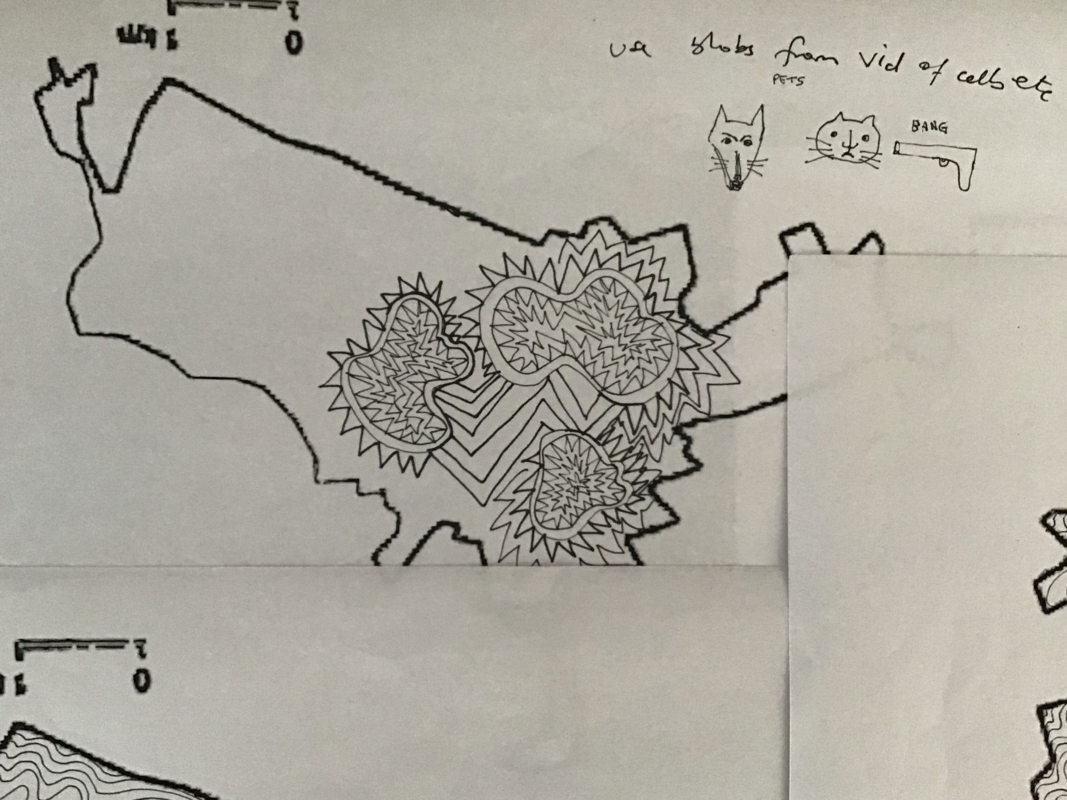
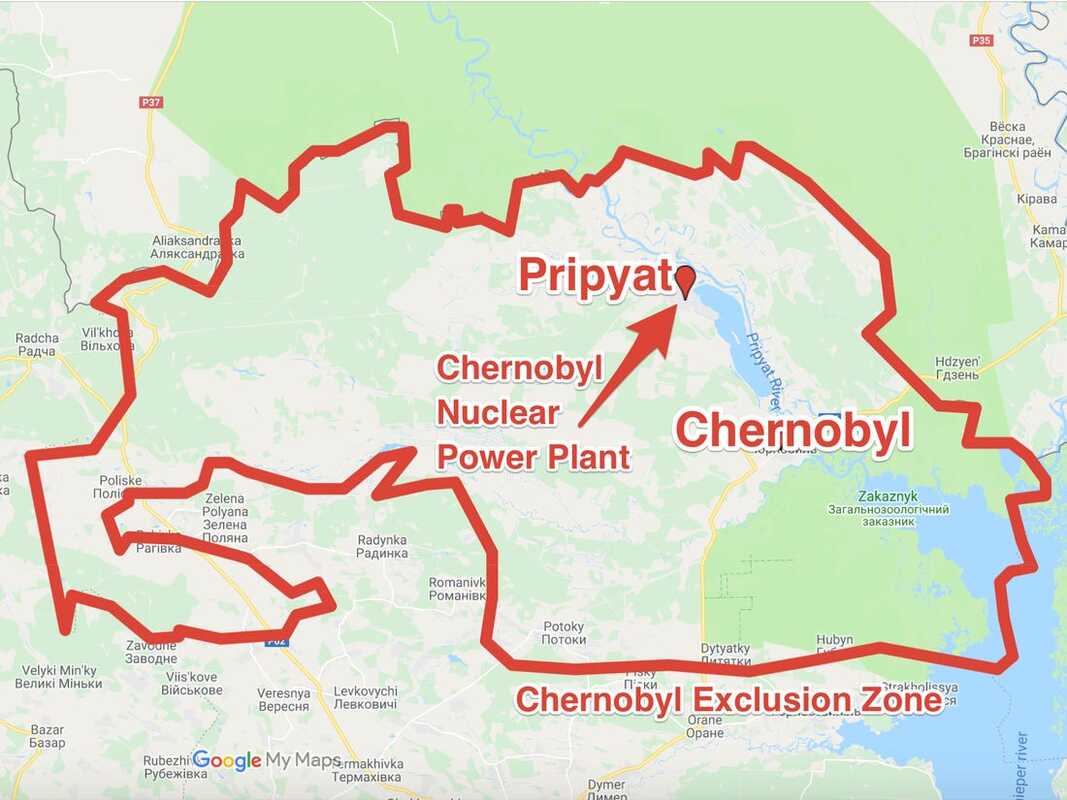
Further to our investigation into psychogeographic location as a way to inform our Noise synth/circuit and PCB design we are now sharing some of our background research which will form a basis for our new circuit. Psychogeography was defined in 1955 by Guy Debord as "the study of the precise laws and specific effects of the geographical environment, consciously organized or not, on the emotions and behavior of individuals." It has also been defined as "a total dissolution of boundaries between art and life". The Chernobyl Decontamination Zone, and the wider Exclusion Zone, is to this day unfit for human habitation, although a few people returned to live there despite the dangers of radiation. Below are maps of the decontamination zone at Chernobyl, with some of the initial designs for the PCB artwork
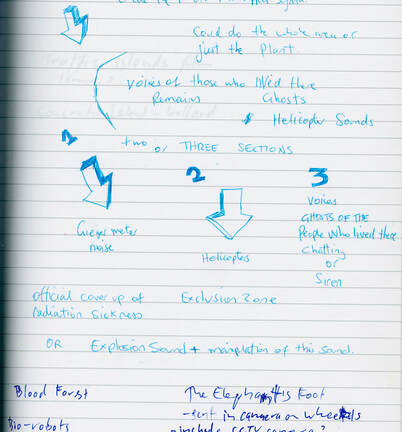
The people who were required to work within the decontamination zone were known as "liquidators" and "bio-robots". It is their stories and the impact on their lives that we find to be at the core of this research as well as the land itself. Below are two videos with individual stories of some of the people most closely involved with the decontamination of this land. They also show some of the background information on the potentially disastrous effect on Europe which was was narrowly escaped, footage of the 'bio-robots' at work on the roof of reactor 3, and the extremities of radiation exposure to those working on the cleanup including the miners who tunnelled under the reactor. We wanted to create a synth that explores this area both politically and emotionally. Neither of us have visited this site so we are using remote psychogeography by looking at maps, stories, documentaries and TV series made about Chernobyl to inform this project. We want the noise synth to reflect some of the sounds associated with the reactor, the disaster and cleanup. Noises such as the draining of power to reactor 4 as it was switched off - followed by the explosion - are a key idea for us. The synth will also evoke the sound of Gieger counters, warning sirens and malfunctioning electronic systems. These crucial moments and those following are something we focused on when finding the kinds of sounds that the synth will create. The noisy dissonance of disaster, cover up and exploitation. How does something sound when it is about to change history for the lives of many, a decision made, mistakes, negligence by officials, a cover up of the true effects of the disaster. We hope we can with this synth contribute to the dialogue surrounding this disaster, even if it is only a form of a dedication to those affected. The drawings which will be etched onto the PCB are ideas of mutations, currents and the spreading of the invisible radiation that was only felt as a metallic taste in the mouth. Now contained within the Sarcophagus, Reactor 4 is for the time being under control, yet the decontamination and exclusion zones remain, accessible only by official tour, and have been inhabited by nature and wildlife. Would anybody feel comfortable playing this instrument? Yes, because it is only an instrument, it is not supposed to make you feel comfortable but it prompts the history of its psychogeographical references. The voice of radiation amplified. The radiation was never supposed to escape but in the hands of the wrong people it did. It was a mistake but it was very preventable, it was devastating and is a warning of what corporate and government negligence is capable of. Just one of many examples. The land itself is wounded yet continues to be a beautiful landscape containing within it the discarded remnants of those left behind. Many people have explored this disaster in art and music, for example Pink Floyd have made this video showing locations within the exclusion zone, and the empty houses and remnants of those who once lived there. The interrupted lives and the loss of trust in the government are relevant today as we witness the negligence of various countries' responses to Covid 19. At this stage we are sharing our initial research, designs, thoughts and ideas about this new circuit design which we have been working on for several months now. This is to be able to document the whole process as best we can for future reference and to share our process.
Published by Isn'tses - Lisa McKendrick and Tim Drage |
AuthorLisa McKendrick Archives
May 2024
Categories |


 RSS Feed
